Send webhook events to Slack
If you don’t have a SIEM and you still want to collect Push events generated by webhooks in an alert format, such as a Slack message, consider using Slack’s Incoming webhooks feature.
Note: We don’t recommend this approach for larger organizations because the amount of data could become impractical. We recommend that you gauge event volume by monitoring the Events page in the Push admin console for several days first. Push does not currently provide a method for ingesting only specific events via webhook.
When you’re ready to send webhook events to Slack, follow these steps.
Create an incoming Slack webhook
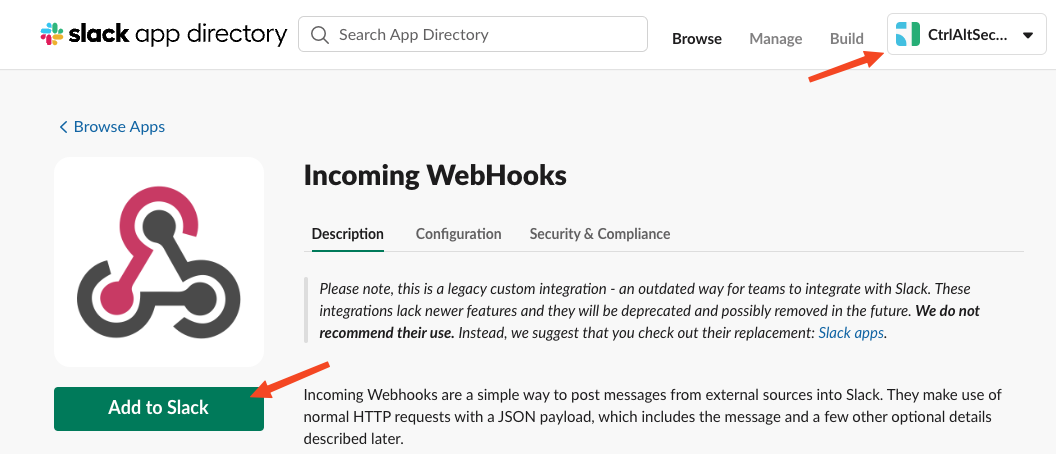
1. Go to the Incoming webhooks app in Slack’s app directory. Make sure that the correct Slack tenant is selected in the top right corner. Click Add to Slack.

2. Select the channel where you want the webhooks to be posted to, or create a new channel for this purpose. Click Add Incoming WebHooks Integration.

3. Slack will then present you with the webhook URL. Save this value. You will need to enter it into the Push admin console when configuring the Push webhook.
Use a workflow tool to modify the webhook data
For Slack to receive and process webhook data, it needs to be in a specific format. Push webhook data looks like the example below (although significantly reduced in size for this example):
{
    "friendlyName": "Account",
    "timestamp": "1717080183",
    "category": "ENTITY",
    "description": "anna@ctrlaltsecure.com on GitHub updated",
    "type": "UPDATE",
}
However, Slack expects the JSON data to resemble the following:
{
    "text": <<Your Data Goes Here>>
}
To make Slack display the Push webhook, we need to modify the data to look like the below:
{
    "text": {
    			"friendlyName": "Account",
    			"timestamp": "1717080183",
    			"category": "ENTITY",
    			"description": "anna@ctrlaltsecure.com on GitHub updated",
    			"type": "UPDATE",
                }
}
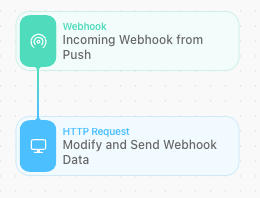
There are many ways to achieve this transformation. For this example, we will use a platform that allows you to construct workflows, such as Tines. In Tines, this becomes a simple 2-step process:

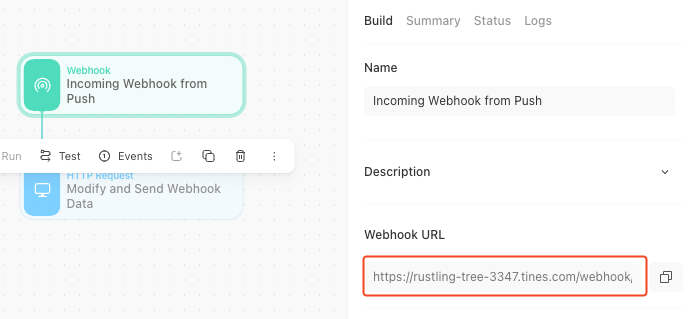
1. For the first action, create a Webhook. Be sure to make note of the Webhook URL as you will need it when configuring the Push webhook in the next section.

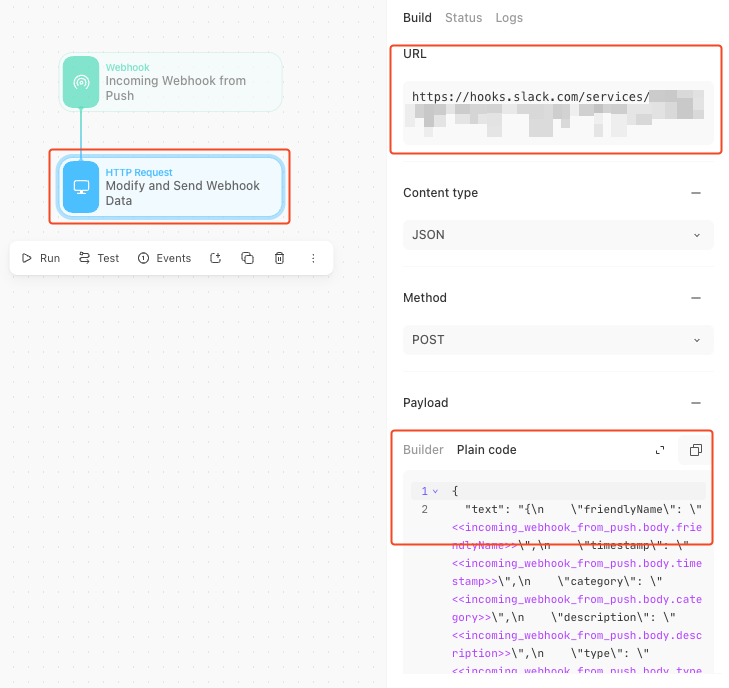
2. Add an HTTP Request step and link it with the Webhook. Paste the webhook URL provided by Slack in the previous section.

3. Under the Payload section, you have two options.
Option A: Paste the below code to get a verbatim copy of the data provided by Push. This is the most complete but may be difficult to read in Slack.
{
  "text": "{ <<incoming_webhook_from_push.body>> }"
}
Note: The exact name of the reference may be different based on what you chose to name the Webhook step.
Option B: You can use some basic formatting to make the data displayed in Slack a bit more legible.
{
  "text": "{\n    \"friendlyName\": \"<<incoming_webhook_from_push.body.friendlyName>>\",\n    \"timestamp\": \"<<incoming_webhook_from_push.body.timestamp>>\",\n    \"category\": \"<<incoming_webhook_from_push.body.category>>\",\n    \"description\": \"<<incoming_webhook_from_push.body.description>>\",\n    \"type\": \"<<incoming_webhook_from_push.body.type>>\",\n    \"new\": \"<<incoming_webhook_from_push.body.new>>\",\n    \"old\": \"<<incoming_webhook_from_push.body.old>>\"\n}"
}
This format adds newlines and spacing to help with readability. Keep in mind that you will need to review this format periodically to make sure newly added fields in the Push webhook data are included. Review Push’s API documentation to confirm you are including all the fields important to your organization.
Create a webhook in Push
Finally, go to the Push admin console to add a webhook and paste in the URL of your Tines webhook.
Refer to the Generic setup steps for SIEM or SOAR for instructions.