Add employees
Overview
You can add employees to Push and assign licenses in one of the following three ways:
Installing the Push browser extension via a managed deployment to employee browsers, and then enabling automatic licensing. This allows Push to identify new browser profiles and assign a license automatically, adding the employee to the Push platform.
Syncing your identity provider to import basic employee details and then manually assigning licenses to employees you want to add to Push. Syncing your IdP also provides a view across all your connected OAuth integrations and the MFA status of your IdP-managed employee accounts.
Manually adding employees by sending them a self-enrollment email to install the Push browser extension. Self-enrollment also licenses the employees in Push.
Push supports platform integrations with:
By integrating with Okta, Push also imports all known SSO-supported apps in your environment. The Push browser extension will discover any non-SSO or unknown apps used by your employees.
Note: Adding users via the Push extension using the automatic licensing option does not require completing an API integration with your identity provider. However, you will not see certain data in the Push platform without the API integration. See below.
What data is supplied by the identity provider integration vs. the browser extension?
By integrating with your identity provider, Push will provide a view of your SSO apps and connected third-party OAuth integrations, as well as MFA status for your IdP accounts, and OIDC logins (e.g. Sign In with Google and Sign In with Microsoft).
Push can also identify suspicious mail rules in employee inboxes using this integration.
The Push browser extension identifies logins and signups to all apps, including non-SSO apps and free-tier apps. It also identifies the login method and the associated identity provider.
The Push platform distinguishes between employee and administrator accounts:
Employees are created when you integrate with your work platform or you perform a managed deployment of the Push extension while automatically assigning licenses to employees with the extension installed.
Administrators manage the Push platform and must be invited via email, and can even be individuals outside your organization, such as an external managed service provider.
Add via browser extension
You can enroll employees in Push and assign them a license in a single step by enabling the automatic licensing option and completing a managed deployment of the Push browser extension.
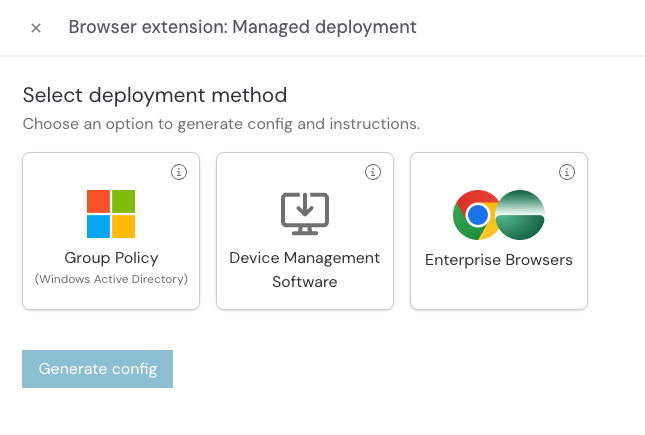
Push supports managed deployment for the extension via the following methods:
Google Admin Console managed Chrome
Microsoft Group Policy managed Chrome, Edge, and Firefox
Device management software on Windows for Chrome, Edge, and Firefox. Documented example is for Microsoft Endpoint Manager (Intune).
Device management software on macOS for Chrome, Edge, Firefox, Brave, Arc, and Safari.
Prisma Access enterprise browser
Advantages of the browser extension enrollment method:
Deploy the extension silently to specific employee groups defined in your MDM or managed browser tool without any end-user interaction.
Automatically license employees, including any newly joined employees, in your managed groups to add them to Push.
Require the use of the extension in all managed browser profiles and prevent it from being disabled by end-users.
Learn more about performing a managed installation of the Push browser extension.
Automatic licensing option
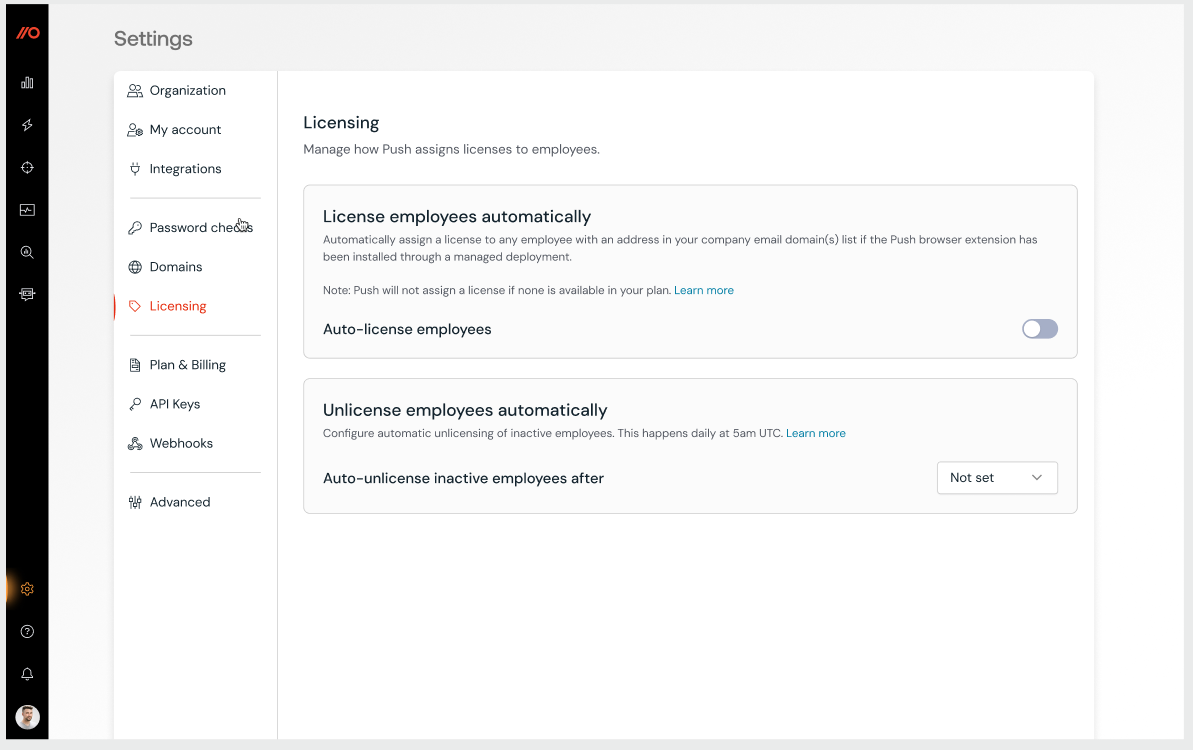
You can automatically assign a license to any employee with an email address in your specified company email domain(s) if the Push browser extension has been installed through a managed deployment.
In the Push admin console, go to Settings > Licensing and toggle on automatic licensing.
The Push browser extension is able to identify the user of a browser by looking for an email address from an open Gmail or Microsoft Outlook browser tab.
Once the browser extension identifies the user, Push will automatically create the employee account in the Push platform and assign a license. The user will then appear in the list on the Employees page.
Note: Push will not assign a license if none is available in your plan. Unlicensed employees will appear in the Unlicensed list linked from the Employees page.
Add via Microsoft 365 or Google Workspace
You can integrate Push with Microsoft 365 or Google Workspace via an API integration that uses OAuth. If your employees use both, you should integrate Push with both platforms in order to view all the third-party OAuth integrations with permissions to those platforms.
After integrating with M365 or Google, Push will sync your employee records. You will then need to manually assign licenses to the employees you wish to add to Push, as well as install the browser extension using a managed deployment or via self-enrollment.
Prerequisites: To complete the API integration, you’ll need an administrator role in M365 or Google Workspace with permission to complete OAuth integrations. For Microsoft, this is the global administrator role. For Google, it is the Super Admin role.
What permissions are required?
We request the minimum scopes possible for our API integration and let you customize them if you prefer. When configuring your integration, you can remove any scopes you don’t want to allow (note: Okta does not support per-scope configuration, but Microsoft and Google do), as well as view sample data for each scope requested.
To view scopes and make changes, select Need more control over access permissions? from the Integrate an identity provider slide-out panel on the Apps page in the Push admin console.
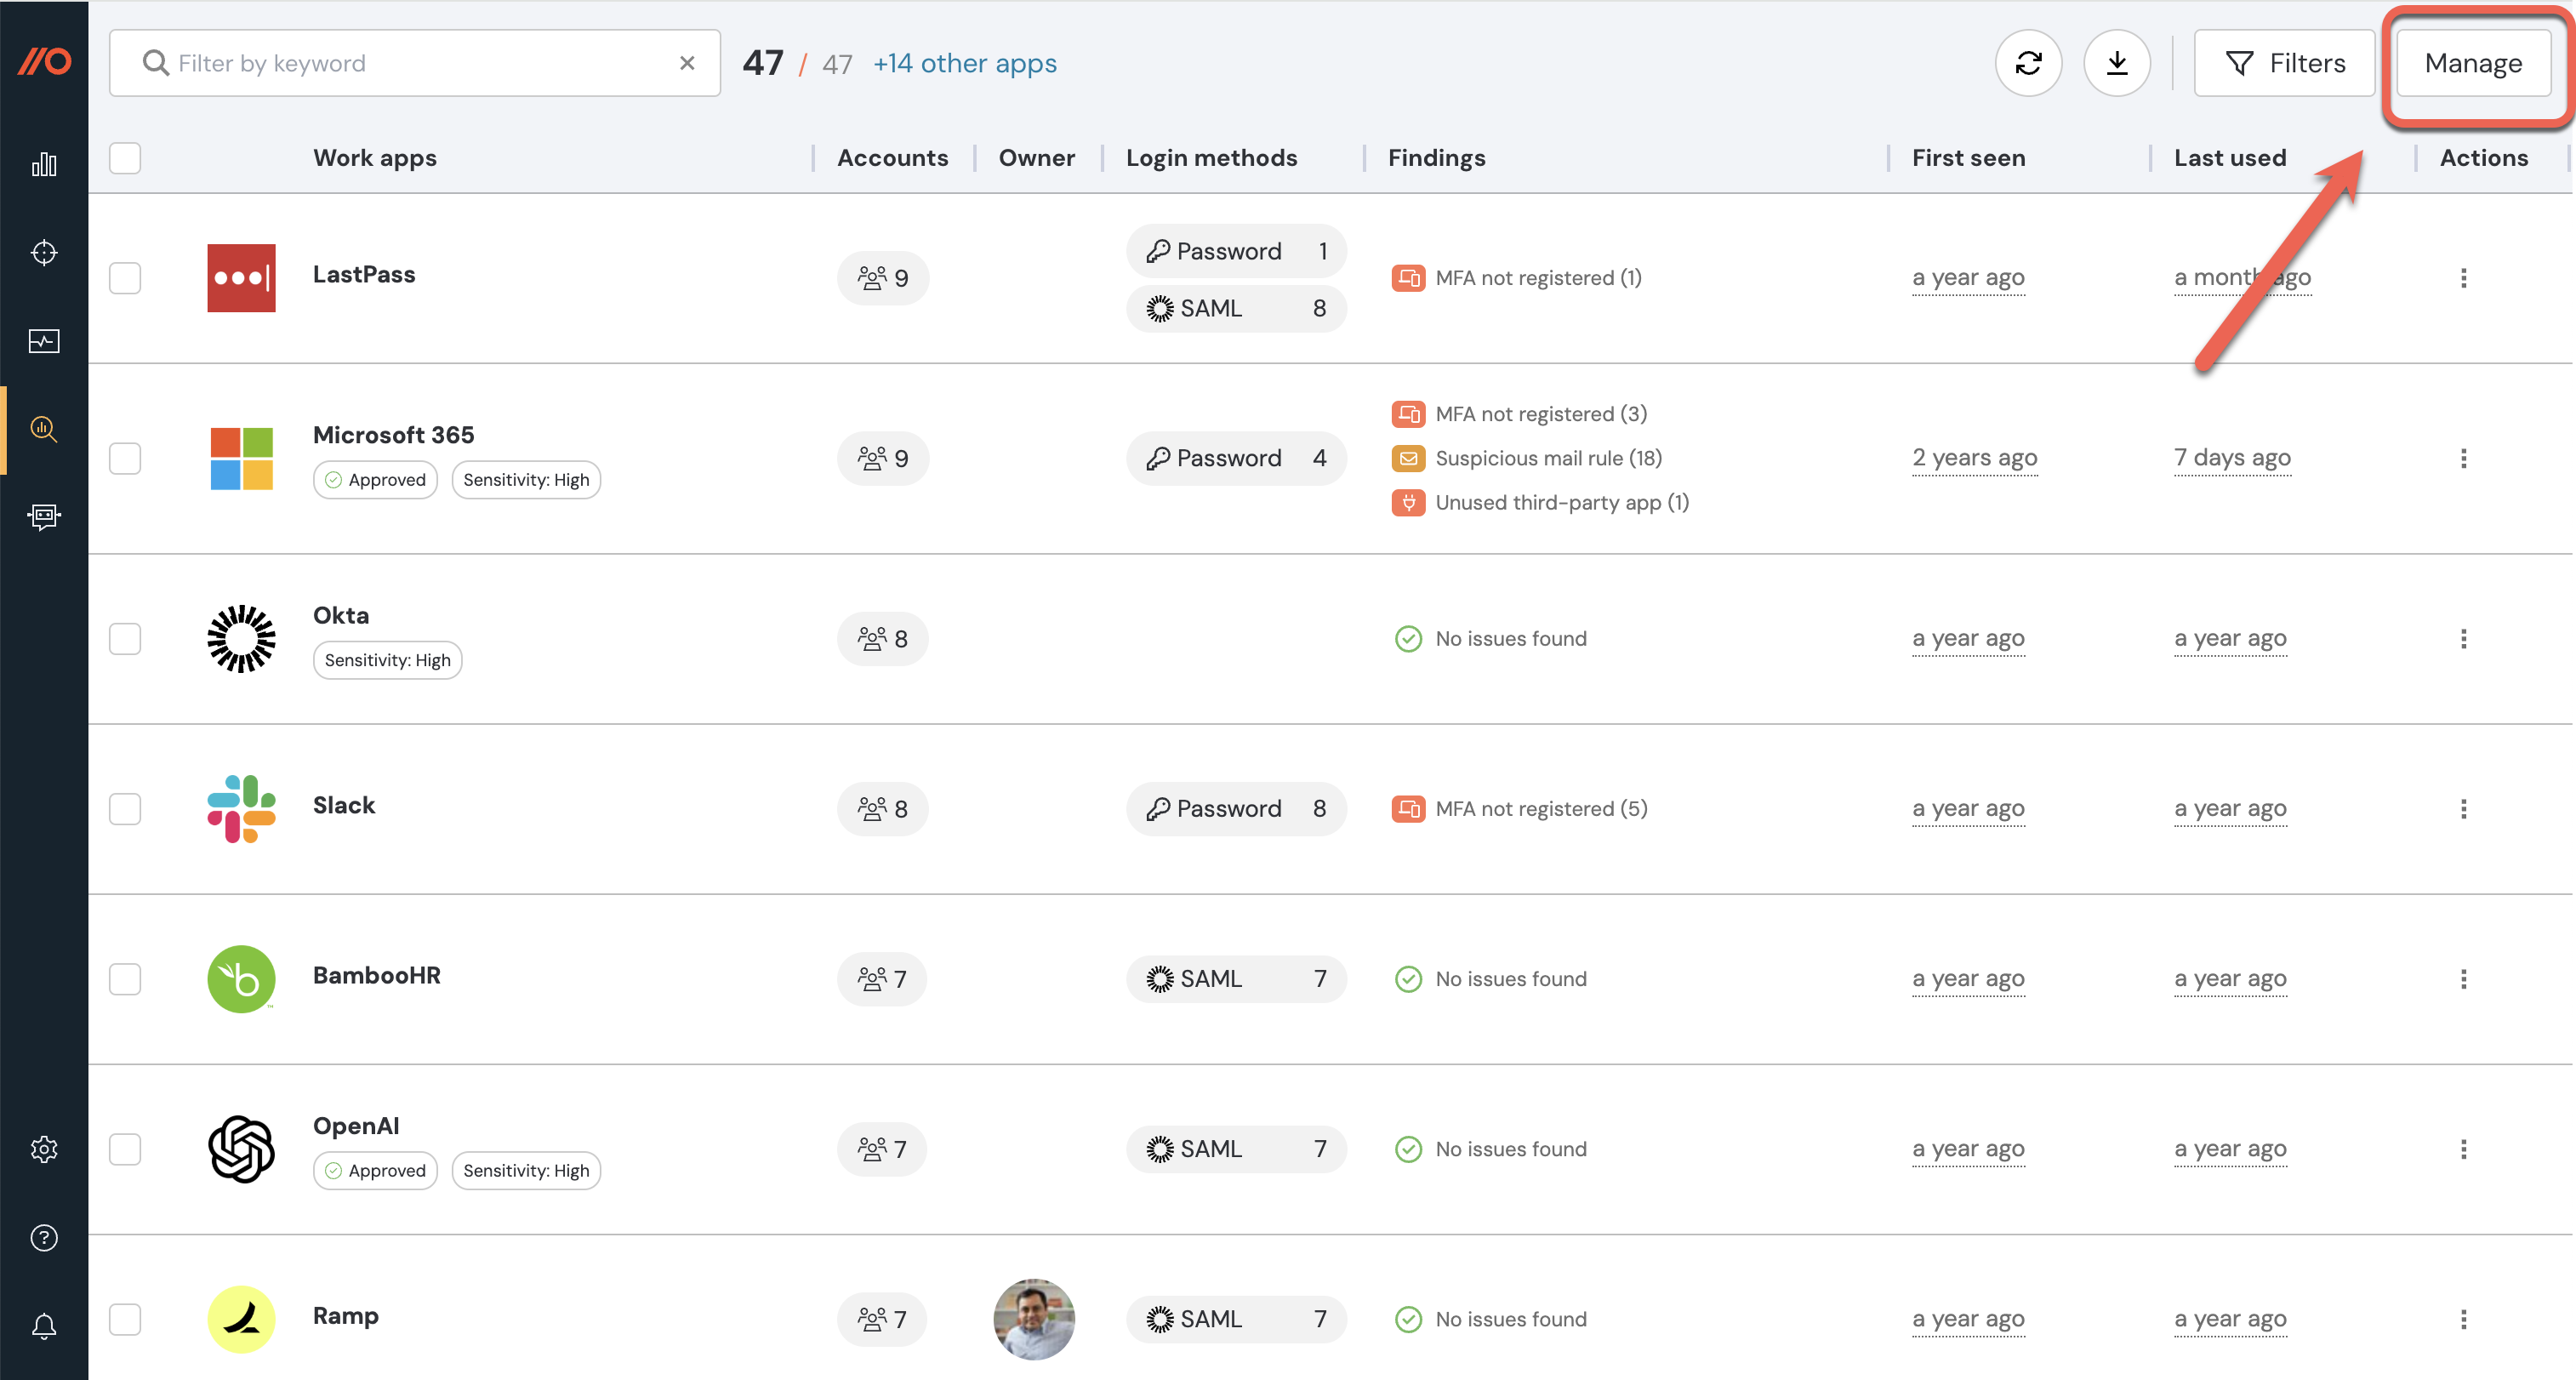
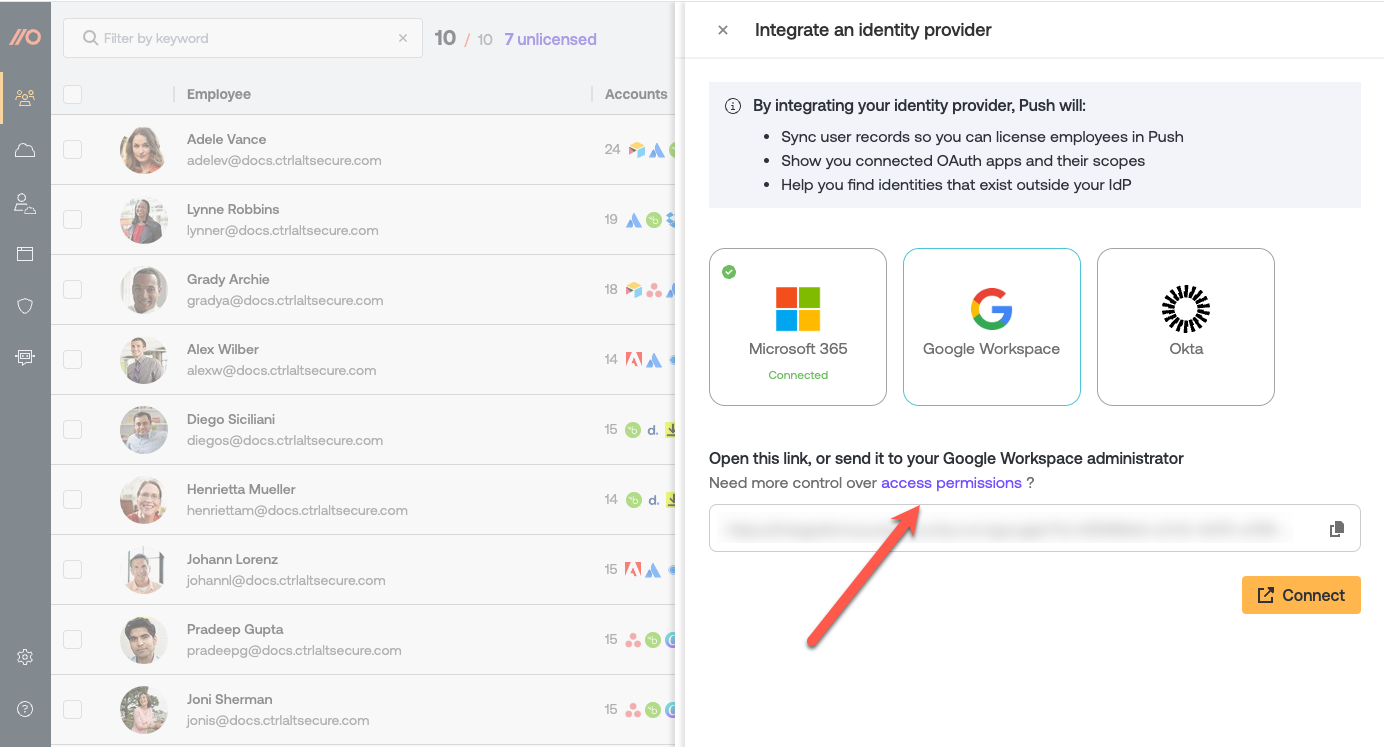
On that screen, you can disable individual scopes to see which Push features will be disabled, so that you can visualize the impact of customizing the access permissions.
Here’s a description of each scope:
Microsoft 365 scopes
Scope | Purpose |
|---|---|
ActivityFeed.Read | This scope lets us read your company’s activity data. We use this only to inspect whether logins are performed with or without MFA enforced. |
AppRoleAssignment.ReadWrite.All | This scope is used to remove user relationships with third-party integrations when you delete them via the Push platform. |
Application.ReadWrite.All | This scope allows us to remove third-party integrations via the Push platform when you initiate a deletion. |
AuditLog.Read.All | This scope lets us query sign-in logs for service principals (third-party integrations). |
DelegatedPermissionGrant.ReadWrite.All | This scope is used to remove individual permission grant consents. |
Directory.Read.All | This scope lets us read data in your company directory, such as users, groups and apps. |
MailboxSettings.ReadWrite | This scope lets us read and write to a user’s mailbox settings. We use write permissions to disable suspicious mail rules only at your command. This scope doesn't give us access to mail content. |
Policy.Read.All | This scope lets us read your company policies. We use this only to inspect if Security Defaults or Conditional Access is in use. |
Reports.Read.All | This scope lets us read all service reports. We query only the MFA registration report. |
User.Read | This scope lets us read your profile and read basic company information. |
User.Read.All | This scope lets us read details about the users in your company directory and retrieve their profile picture. |
Google Workspace scopes
Scope | Purpose |
|---|---|
admin.directory.group.readonly | This scope is used to retrieve group alias and member information about Google Groups. This is needed so we can organize results by group membership. |
admin.directory.user.readonly | This scope is used to retrieve user profiles. This is needed to connect user identities to email addresses, mark accounts that are administrators, and identify 2SV status. |
admin.directory.user.security | This scope is used to list OAuth tokens and remove them when you delete them via the Push platform. |
admin.reports.audit.readonly | This scope is used to read Google Workspace token audit reports. This is needed to read logs of historic OAuth app integrations. |
gmail.settings.basic | This scope is used to read mail rules from a user’s mailbox settings. It does not allow reading email messages. It is needed to find suspicious mail rules. |
To integrate with Microsoft 365 or Google Workspace:
1. Log into the Push admin console.
2. Navigate to the Apps page in the left sidebar.
3. Click the Integrate platforms button on the setup modal, or select the Manage button in the top right corner and choose Integrate identity provider.

4. On the slide-out panel, select Microsoft 365 or Google Workspace.
5. To view or adjust permissions associated with the integration, click on Need more control over access permissions?
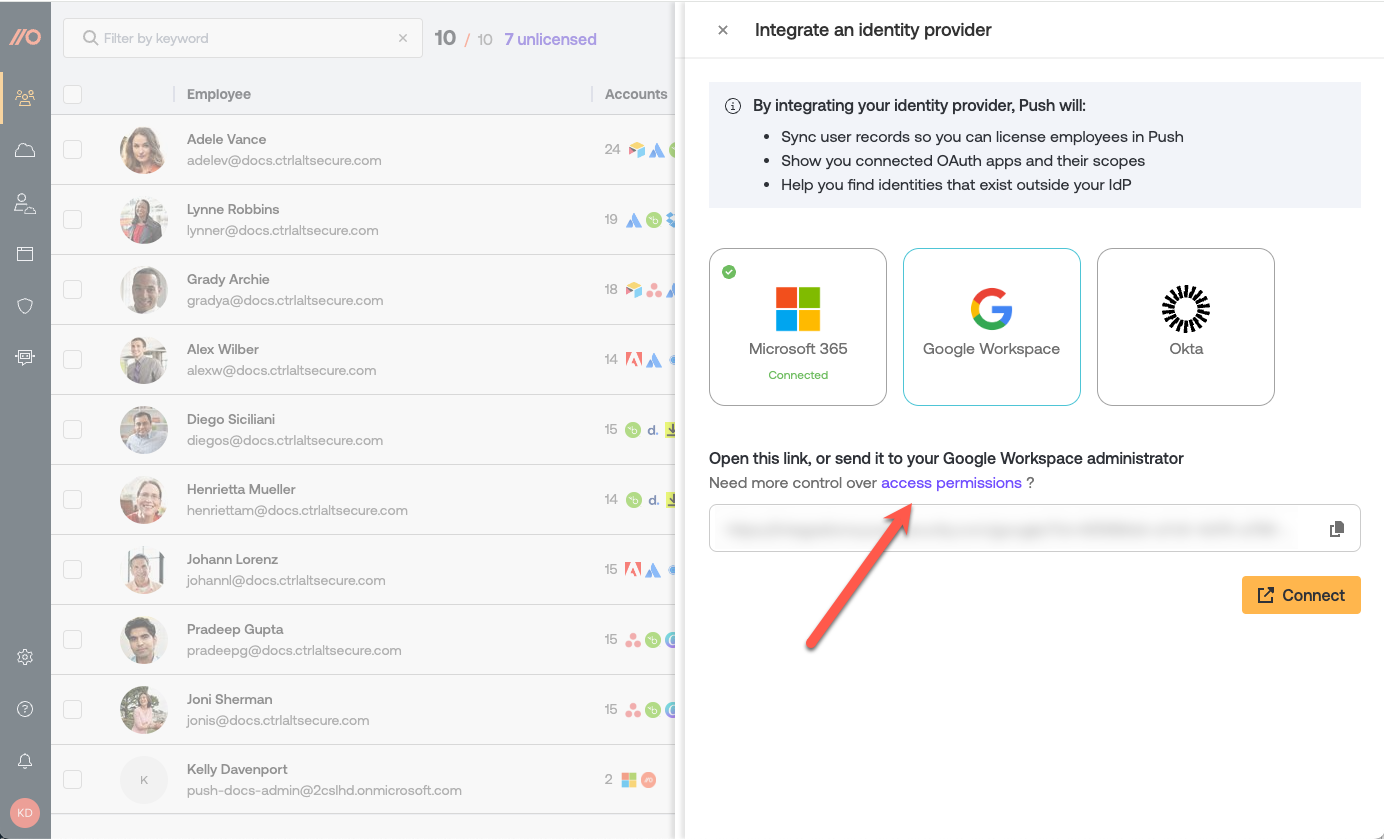
6. If you’re not the administrator of the work platform, you can share the provided integration link with your admin to complete the setup. Otherwise, click Connect to proceed.
7. Consent to the OAuth integration screen. For Google Workspace, you'll also need to give permission to Push through domain-wide delegation.
8. Wait a moment for Push to pull in the employee data.
9. Select which employees you want to license in Push.
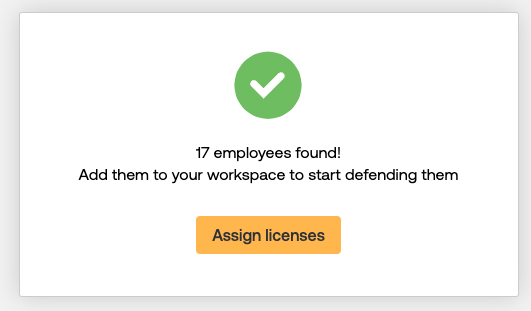
10. After you’ve assigned licenses, you’ll find a list of your employees on the Employees page, where you will start to see which SaaS apps they’re logging into using social logins connected to their work accounts, as well as any third-party integrations used by licensed employees, discovered mail forwarding rules, or a lack of MFA protection.
Add via Okta
To integrate with Okta, you'll use a client secret, your Okta domain, and your client ID to complete the integration configuration.
After integrating with Okta, Push will sync your employee records. You will then need to manually assign licenses to the employees you wish to add to Push, as well as install the browser extension using a managed deployment or via self-enrollment.
Prerequisites: To complete the API integration, you’ll need an administrator role on your Okta tenant.
Okta scopes
Scope | Purpose |
|---|---|
Users and groups | This scope lets us read existing users’ profiles. This scope also includes the ability to view a user’s account recovery question (but not the answer), however Push does not query this information. Okta calls this account recovery question “credentials,” but passwords or answers to the account recovery question are not included in this scope. |
Resources and policies | This scope lets us read about apps. |
Systems | This scope lets us read about system log entries and administrative role assignments. |
To integrate with Okta:
1. Log into the Push admin console.
2. Navigate to the Apps page in the left sidebar.
3. Click the Integrate platforms button on the setup modal, or select the Manage button in the top right corner and choose Integrate an identity provider.

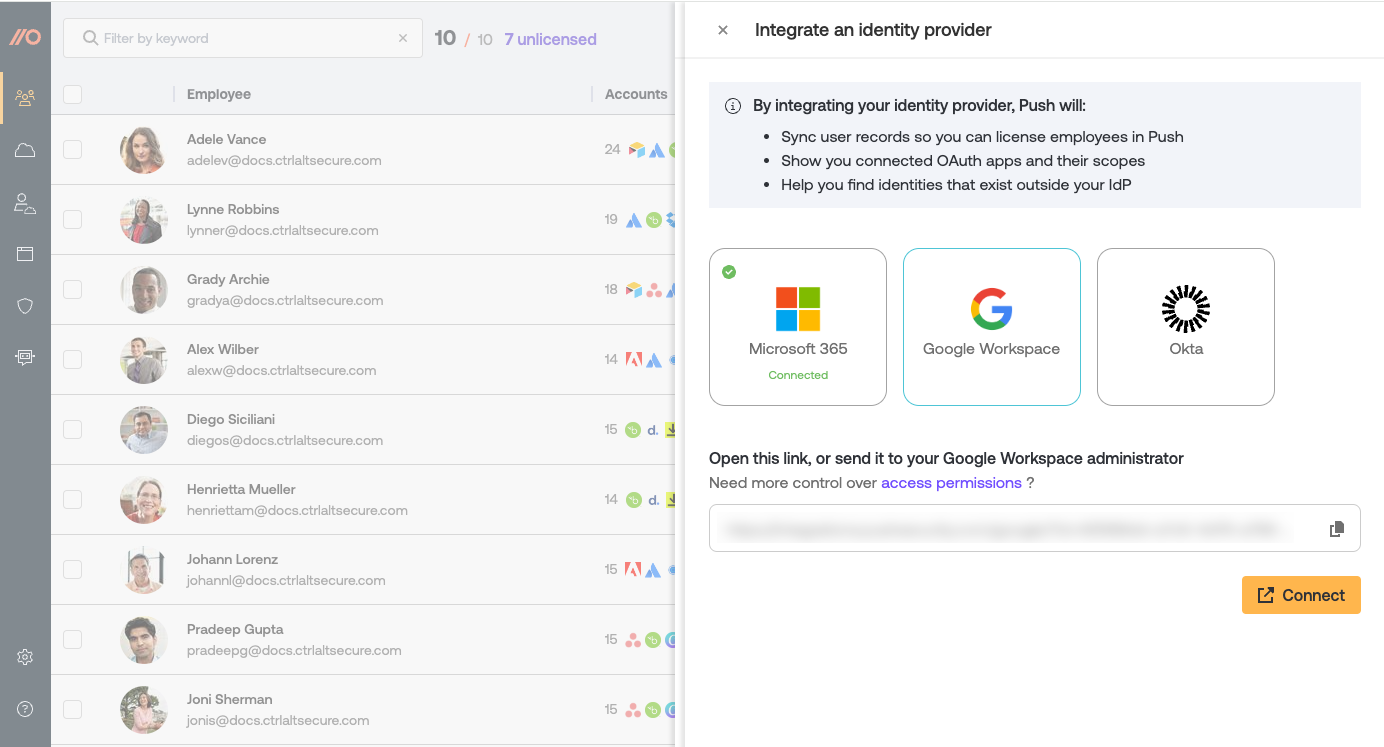
4. On the slide-out panel, select Okta.
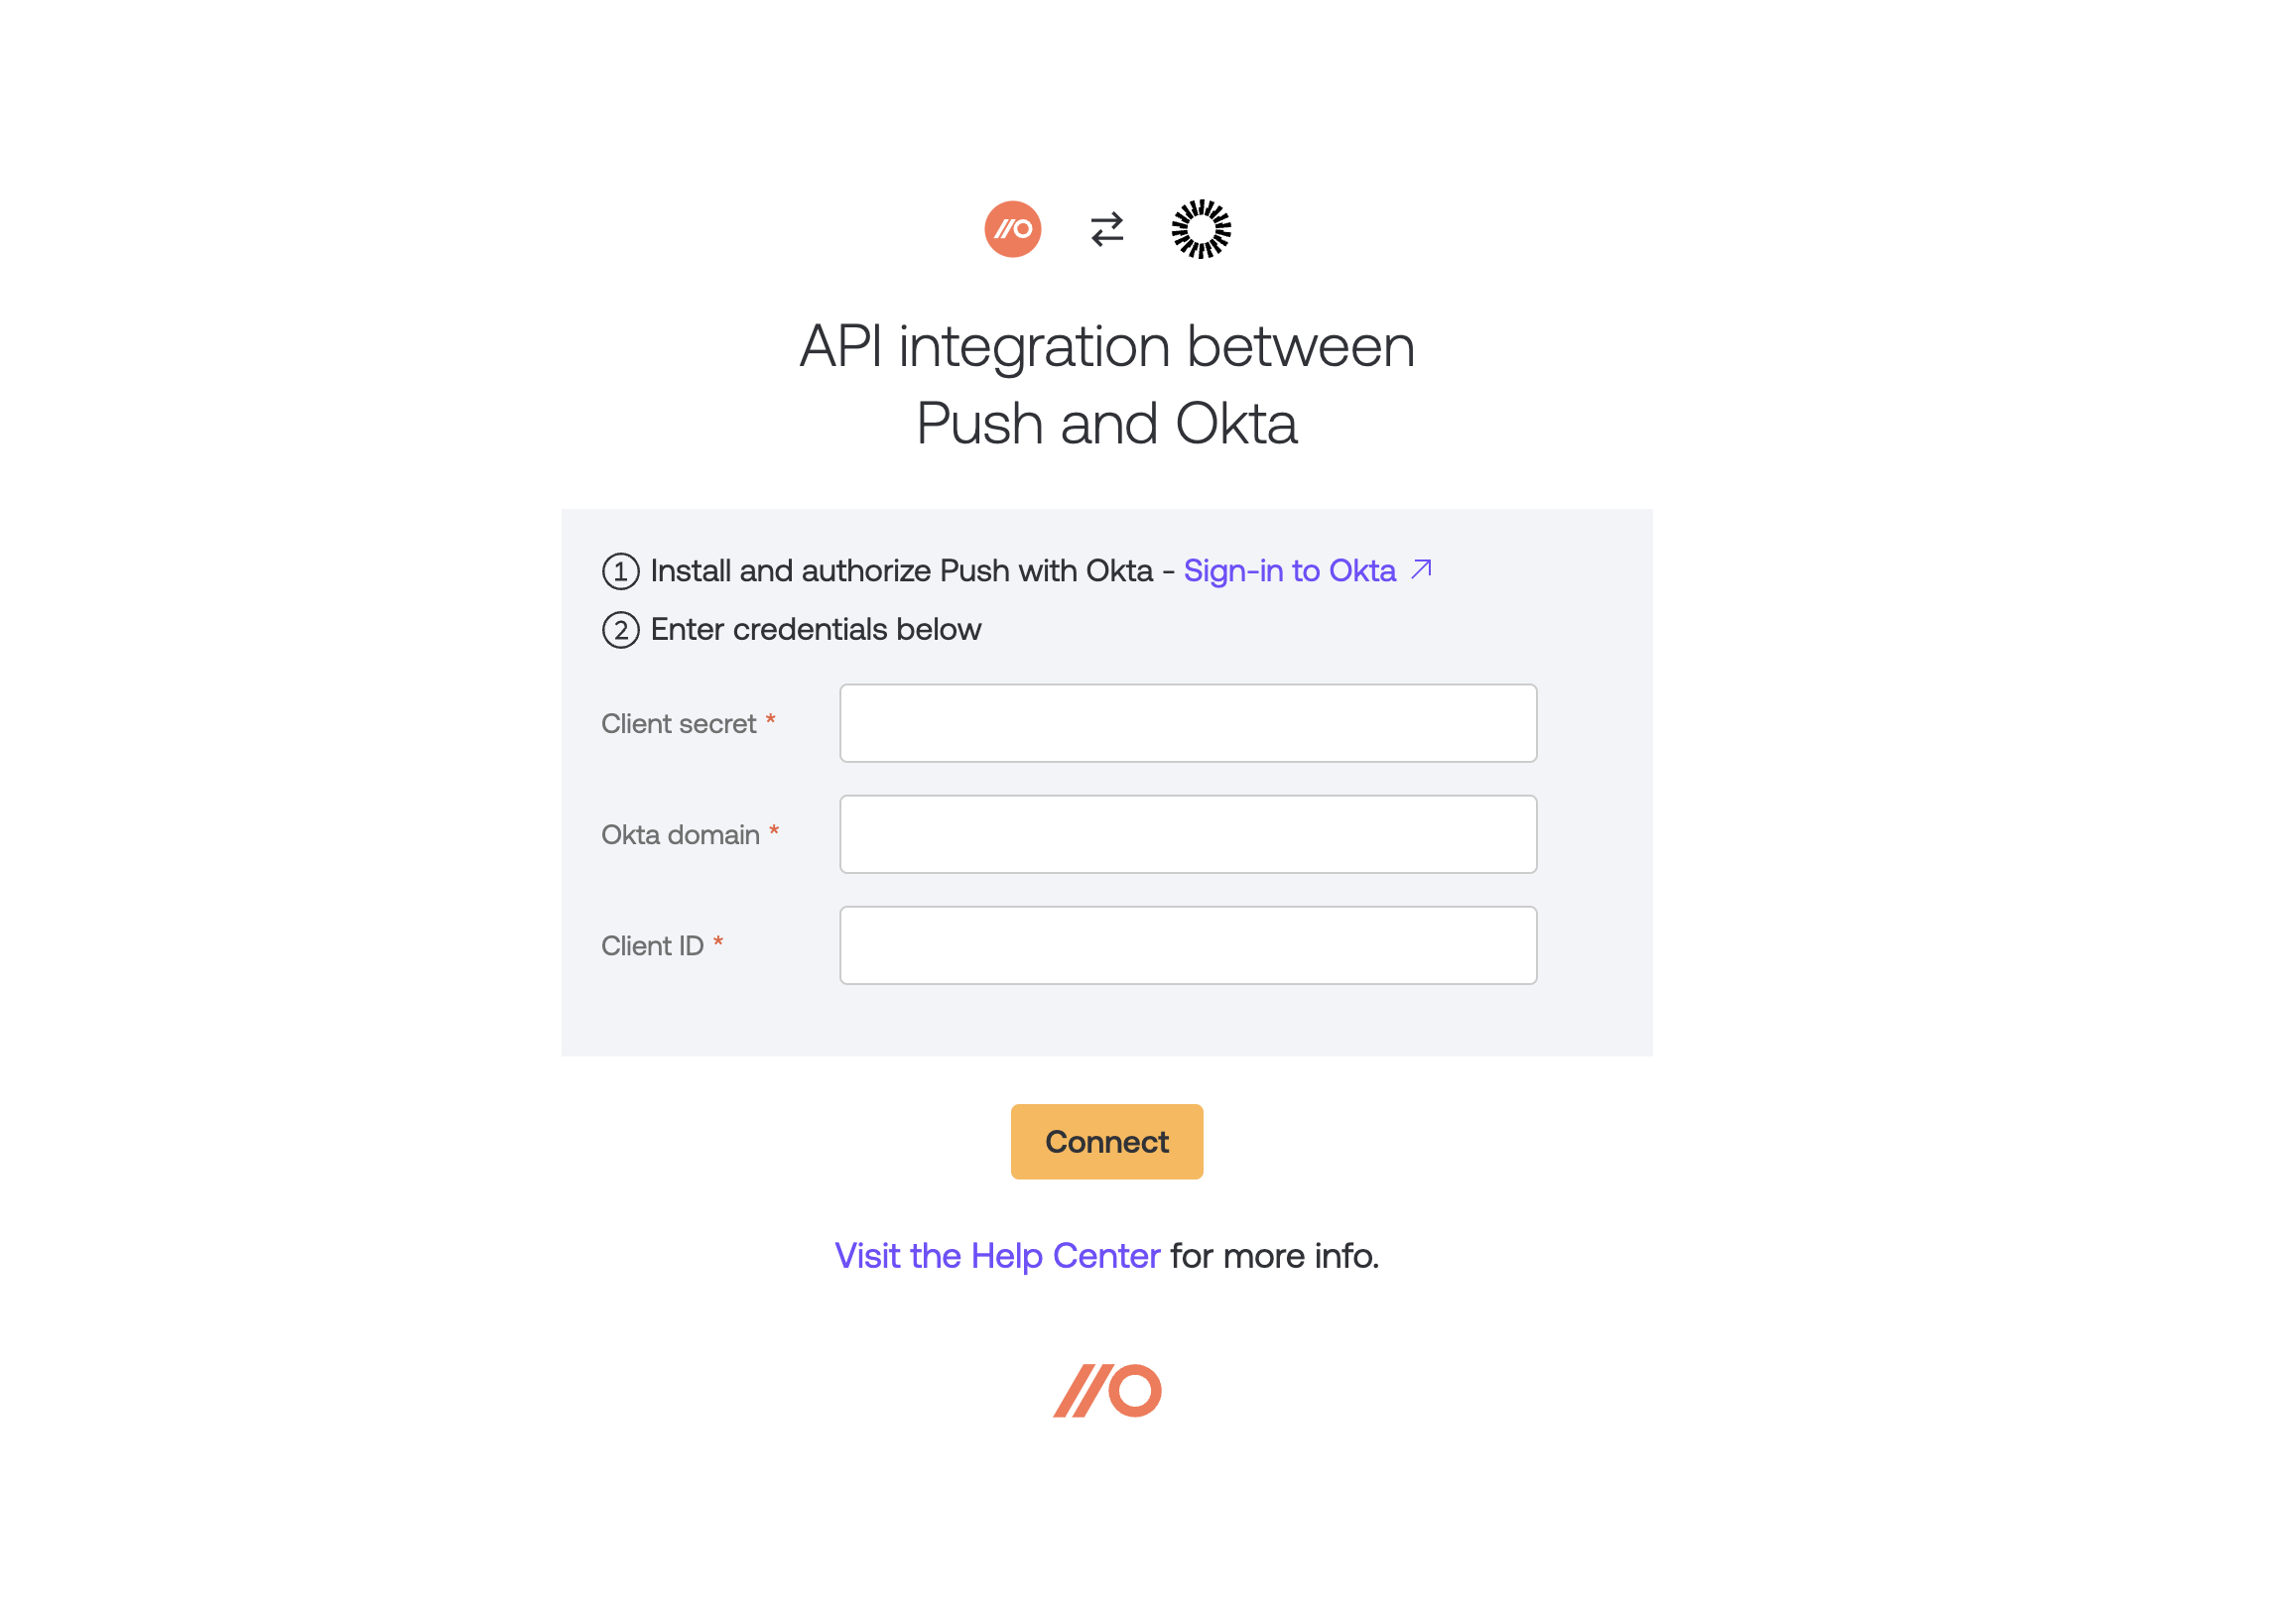
5. Open the integration URL to access the configuration screen.
6. Select Sign in to Okta and leave the Push integration configuration tab open to return to it later. You must log in to Okta in order to generate the client secret and copy your Okta domain and client ID to complete the integration configuration.
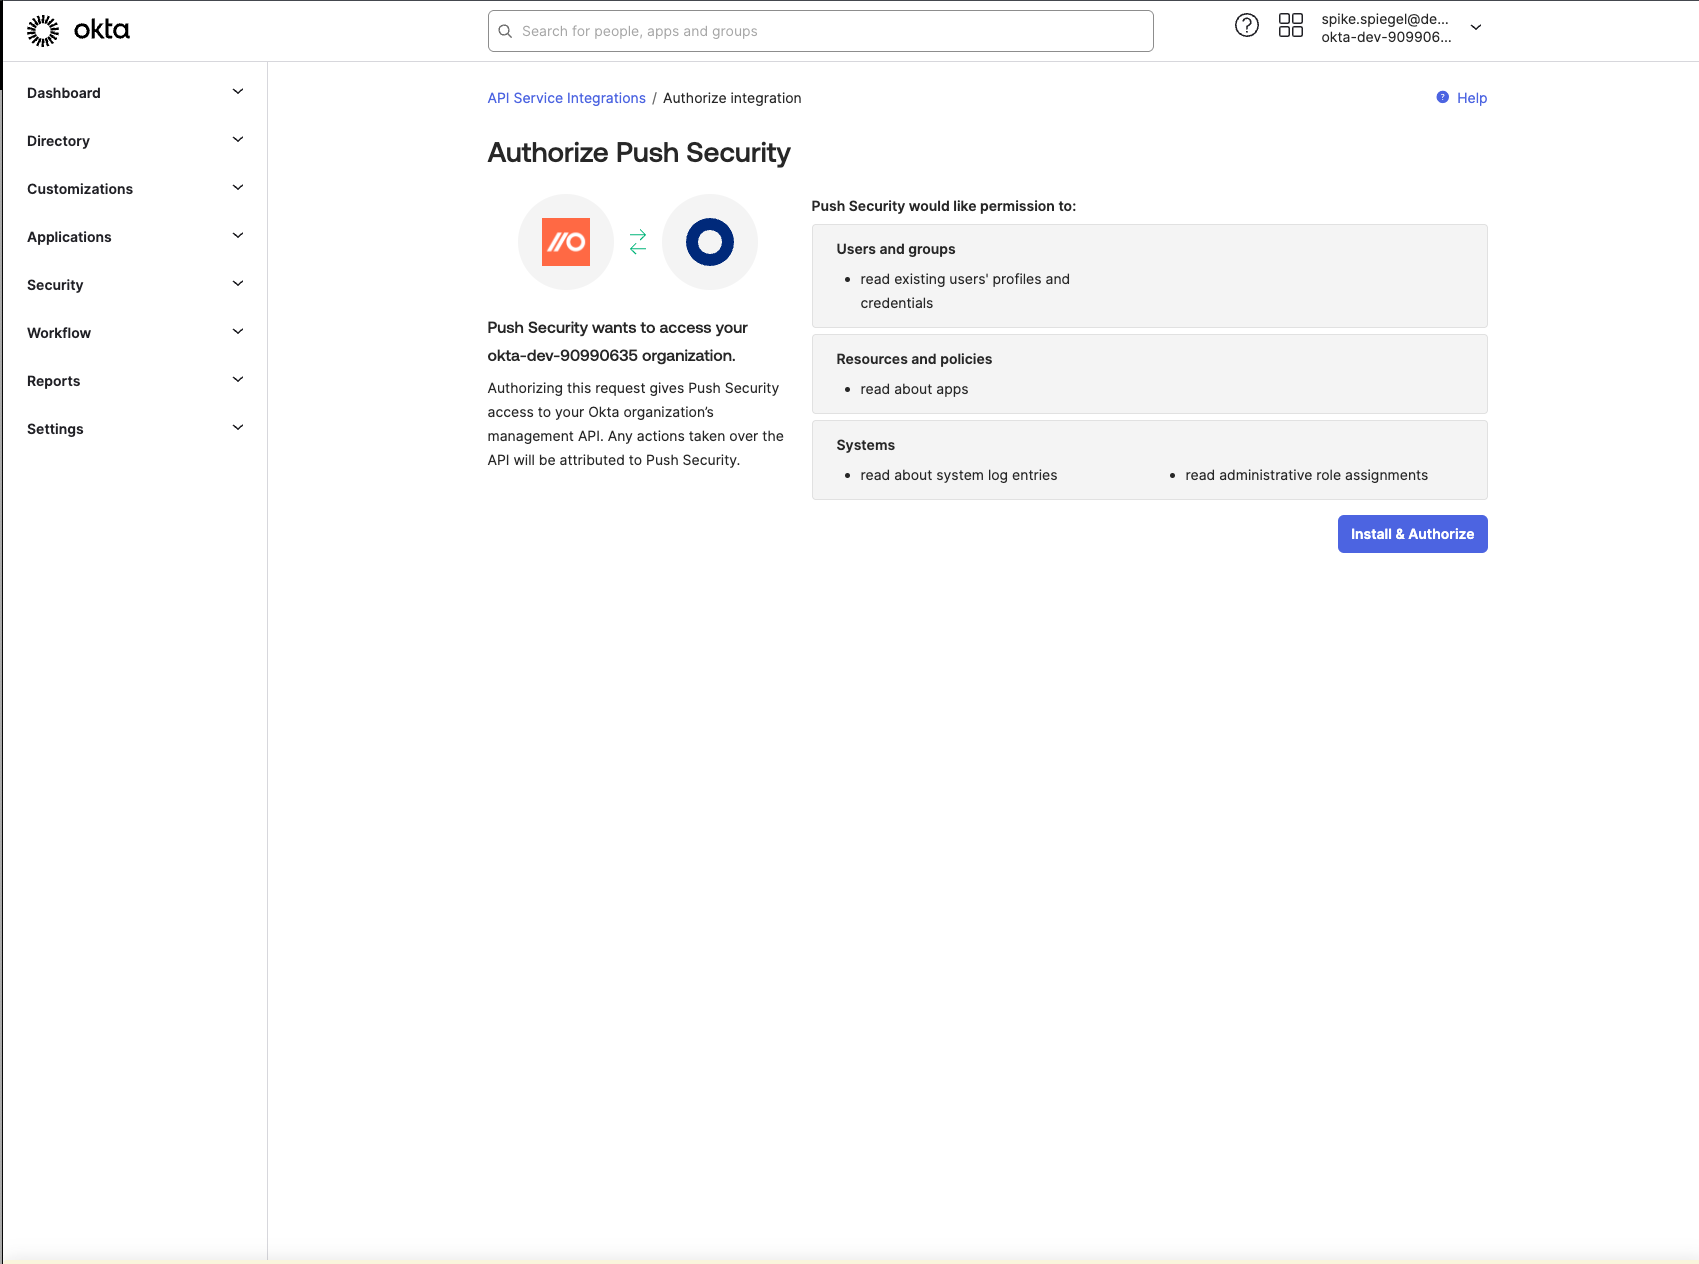
7. In Okta, select Install & Authorize to install the integration and generate your client secret.
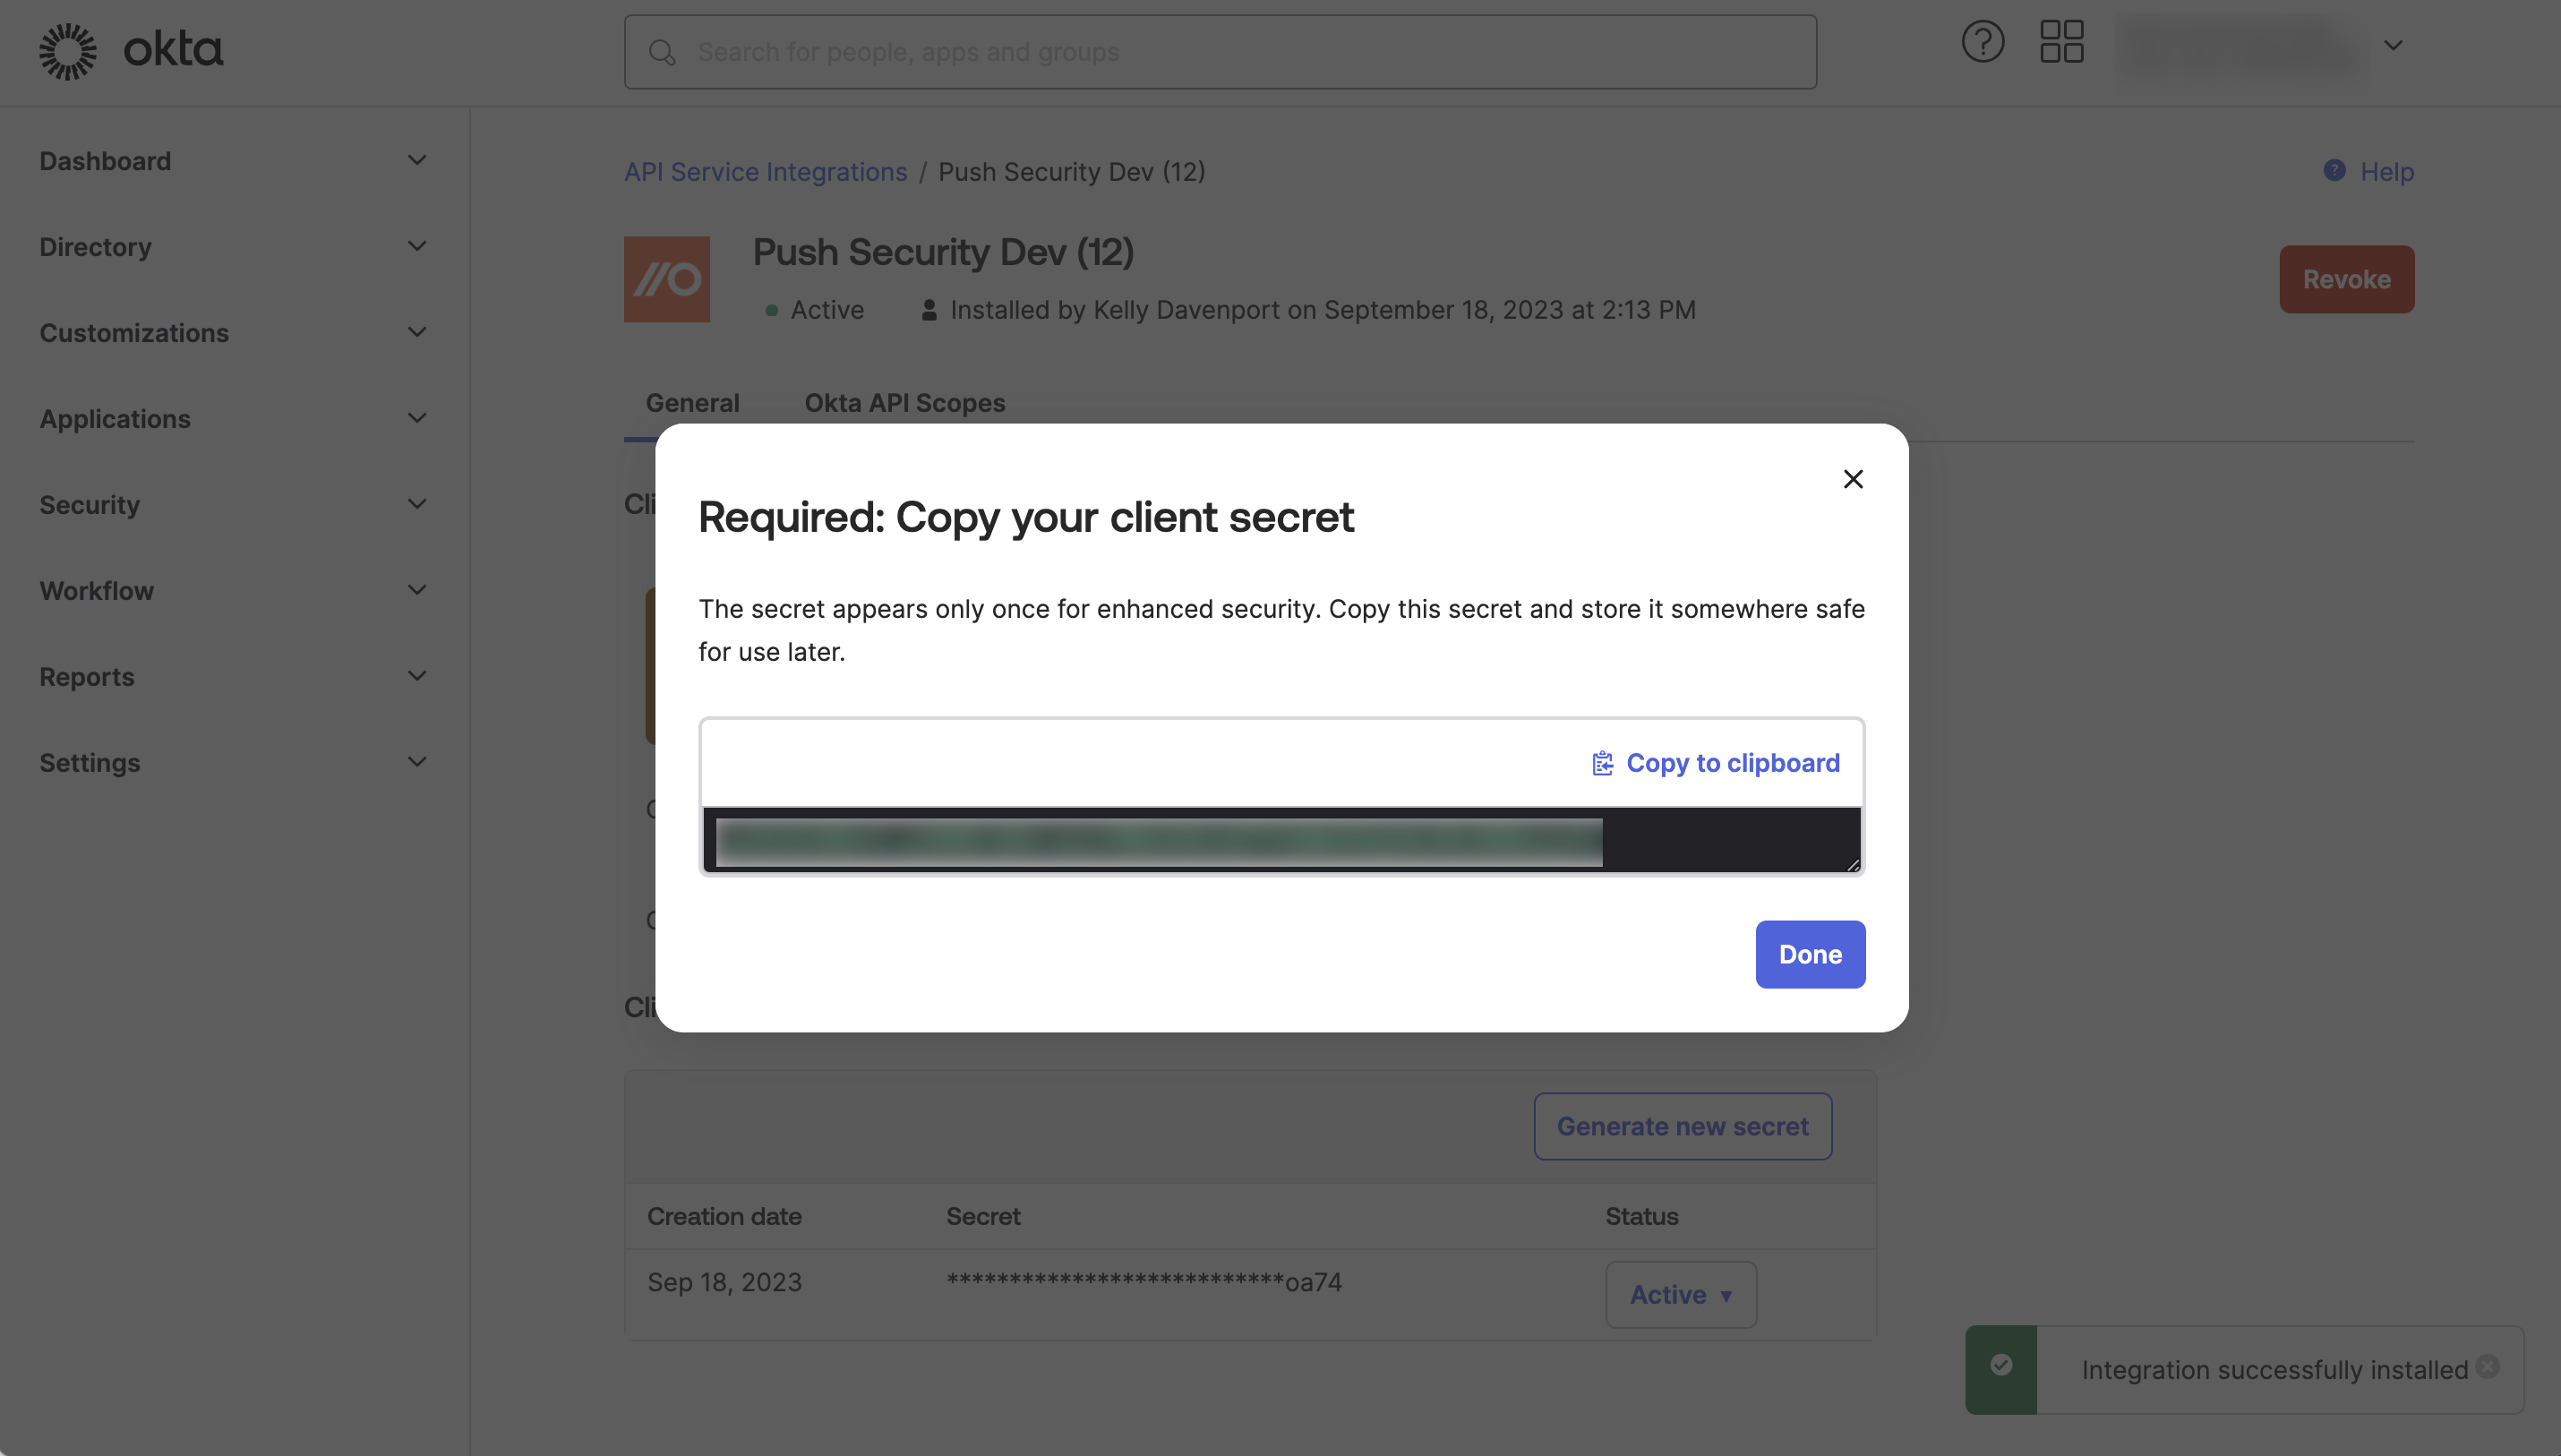
Important! Once you’ve generated the client secret, you can see it only once. Copy it so you can enter it on the Push integration configuration screen from step 6.
Once you’ve copied the client secret and closed the window, you’ll see your Okta domain and client ID.
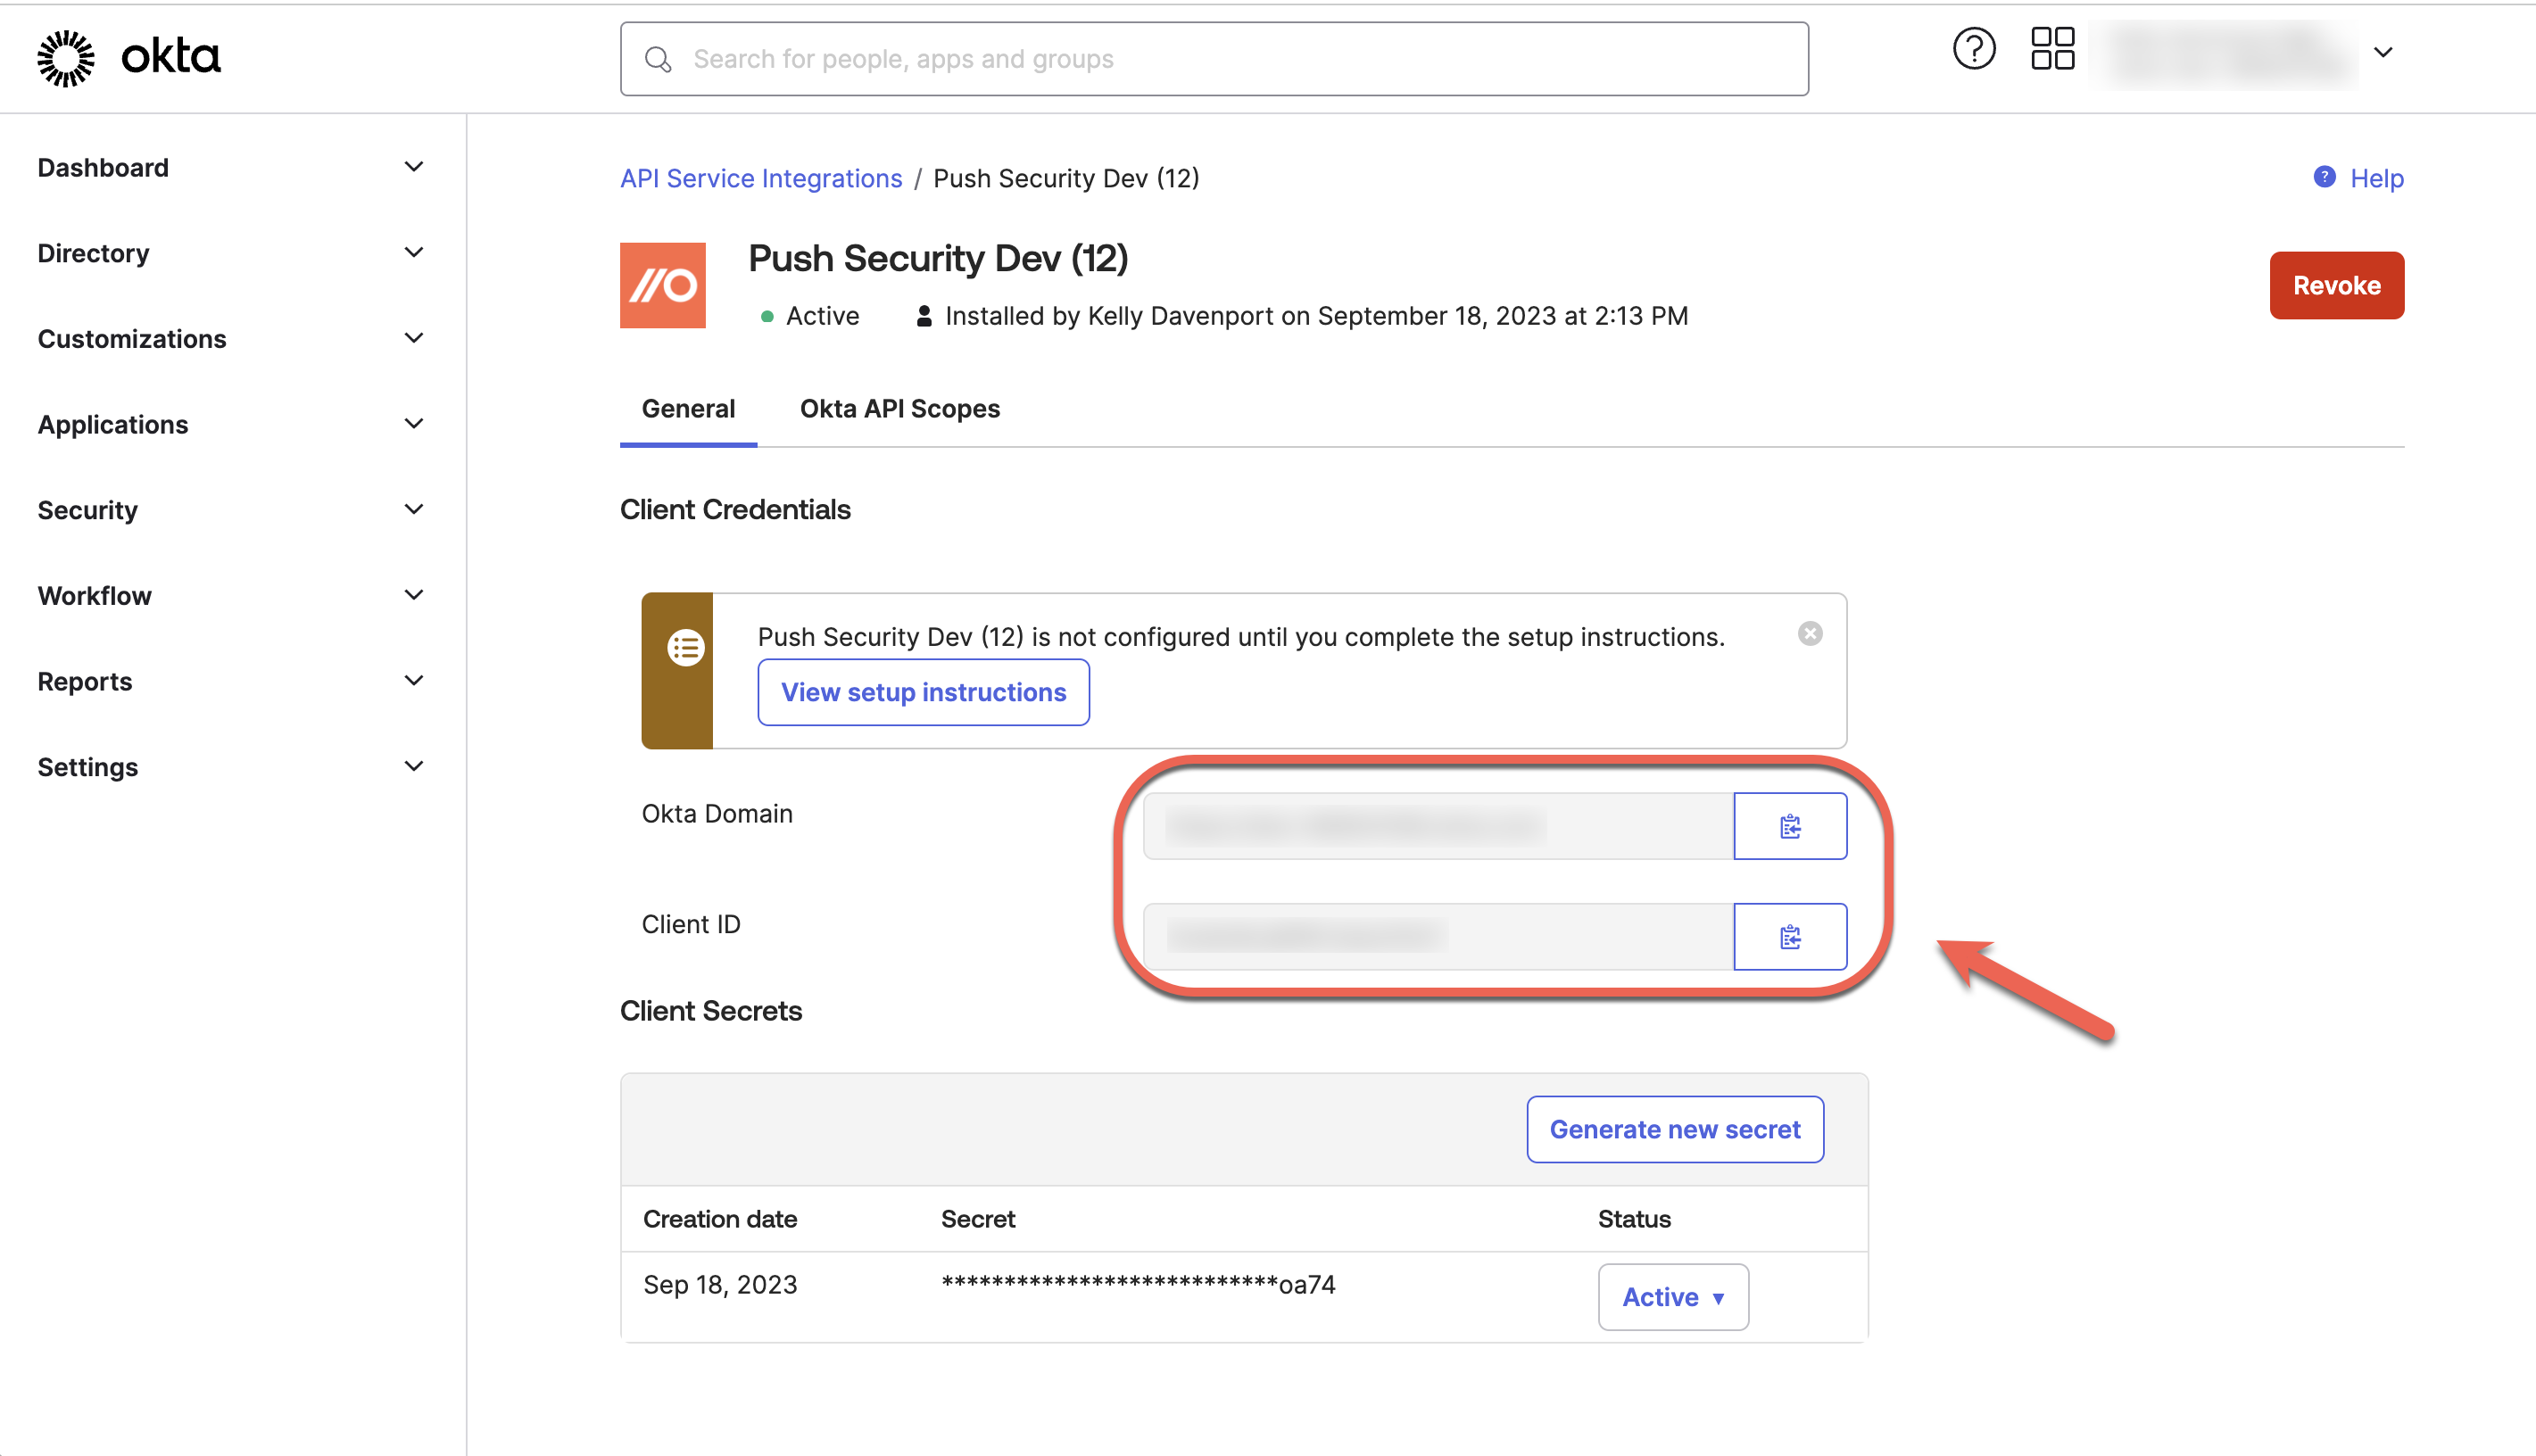
Copy those over to the Push integration configuration screen, too.
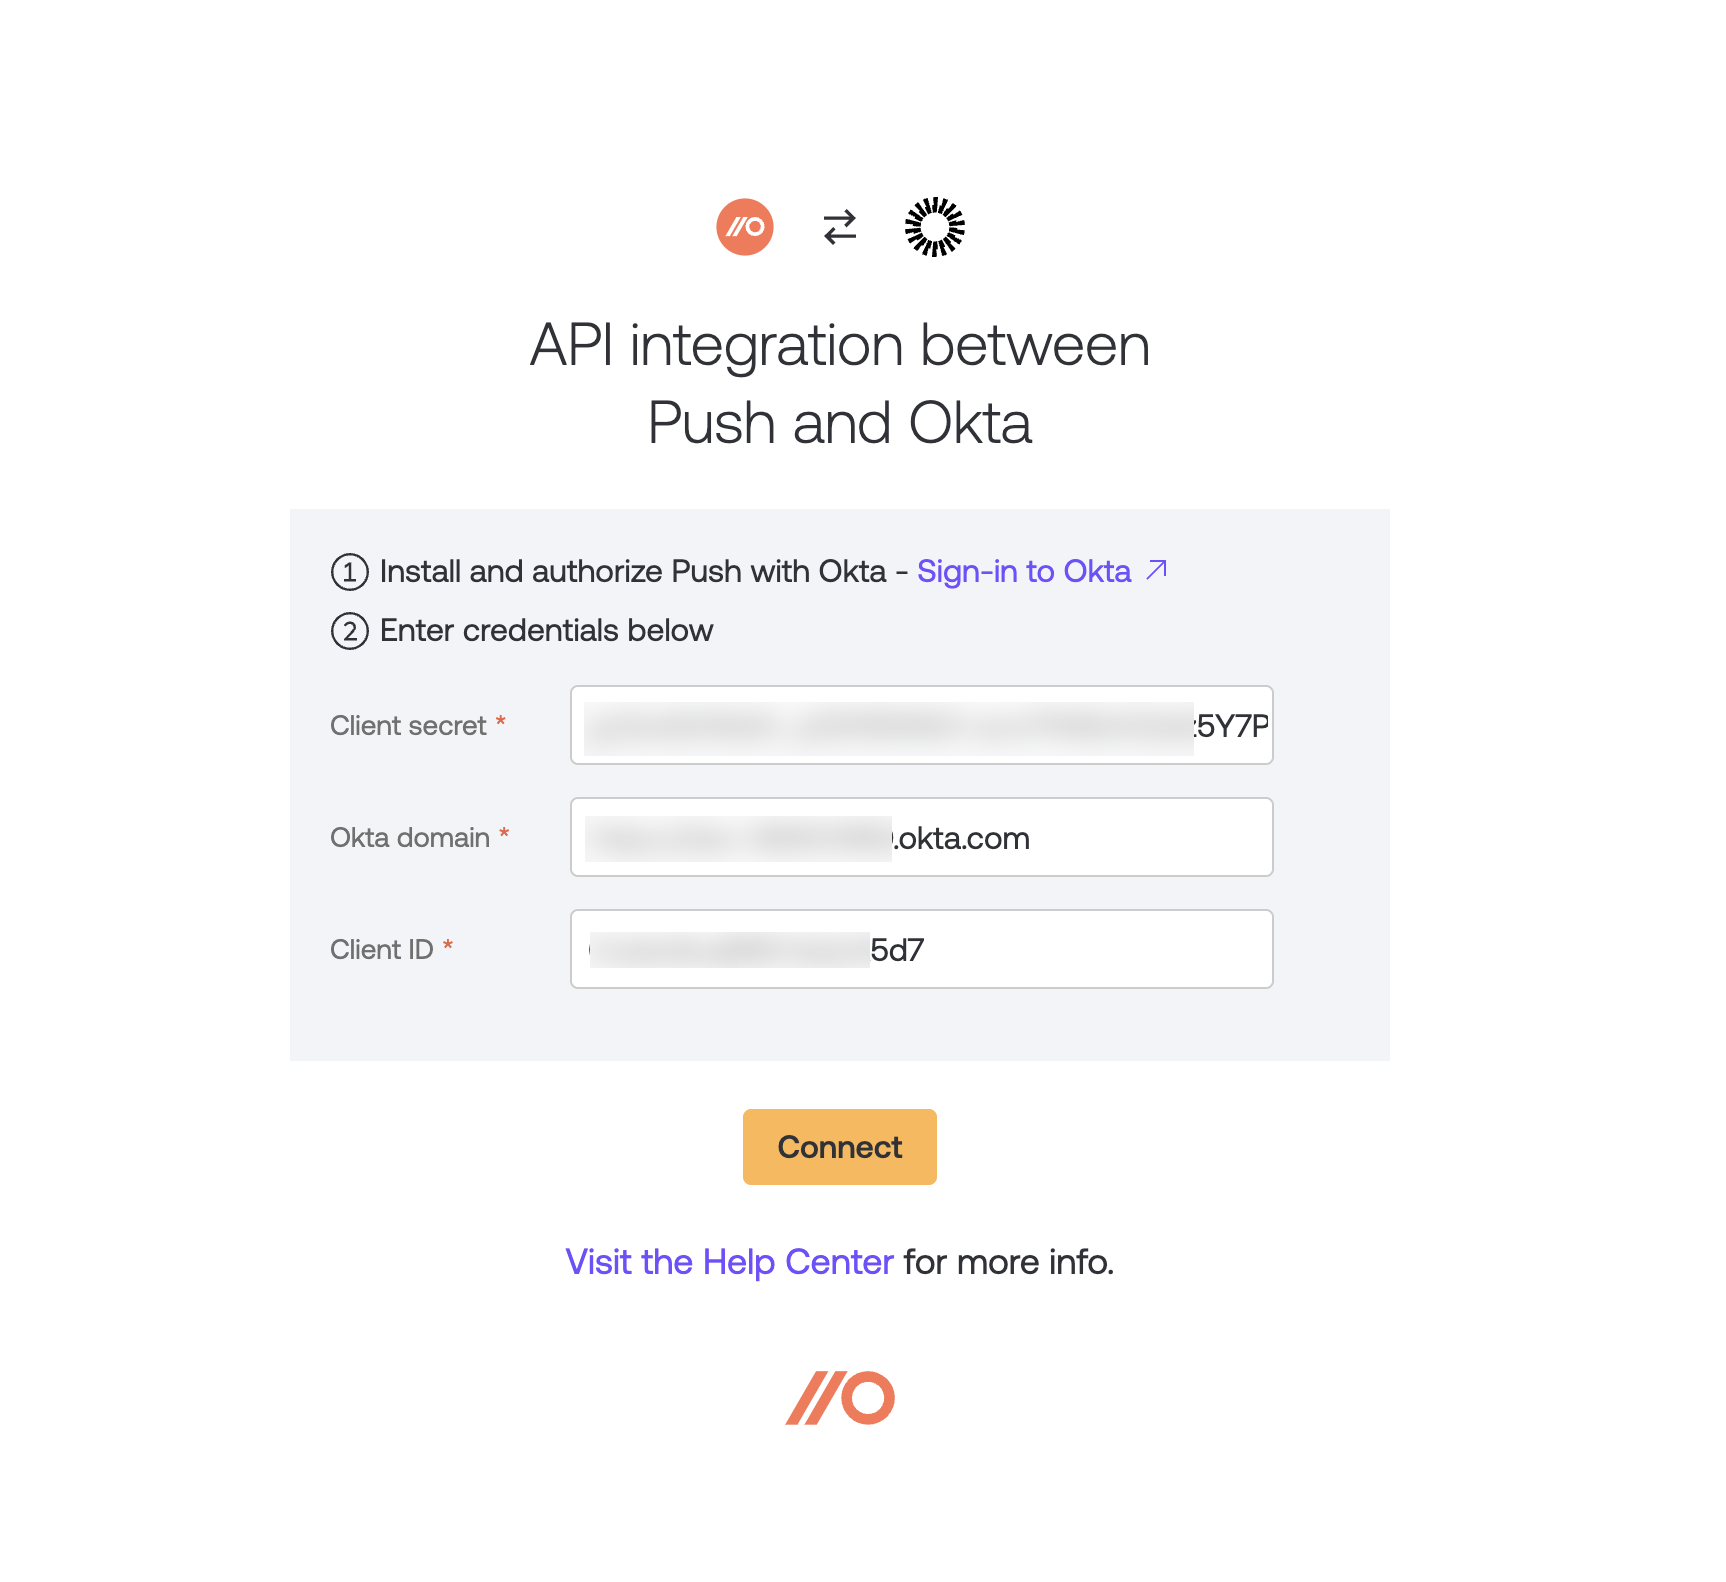
8. Select Connect to complete the integration.
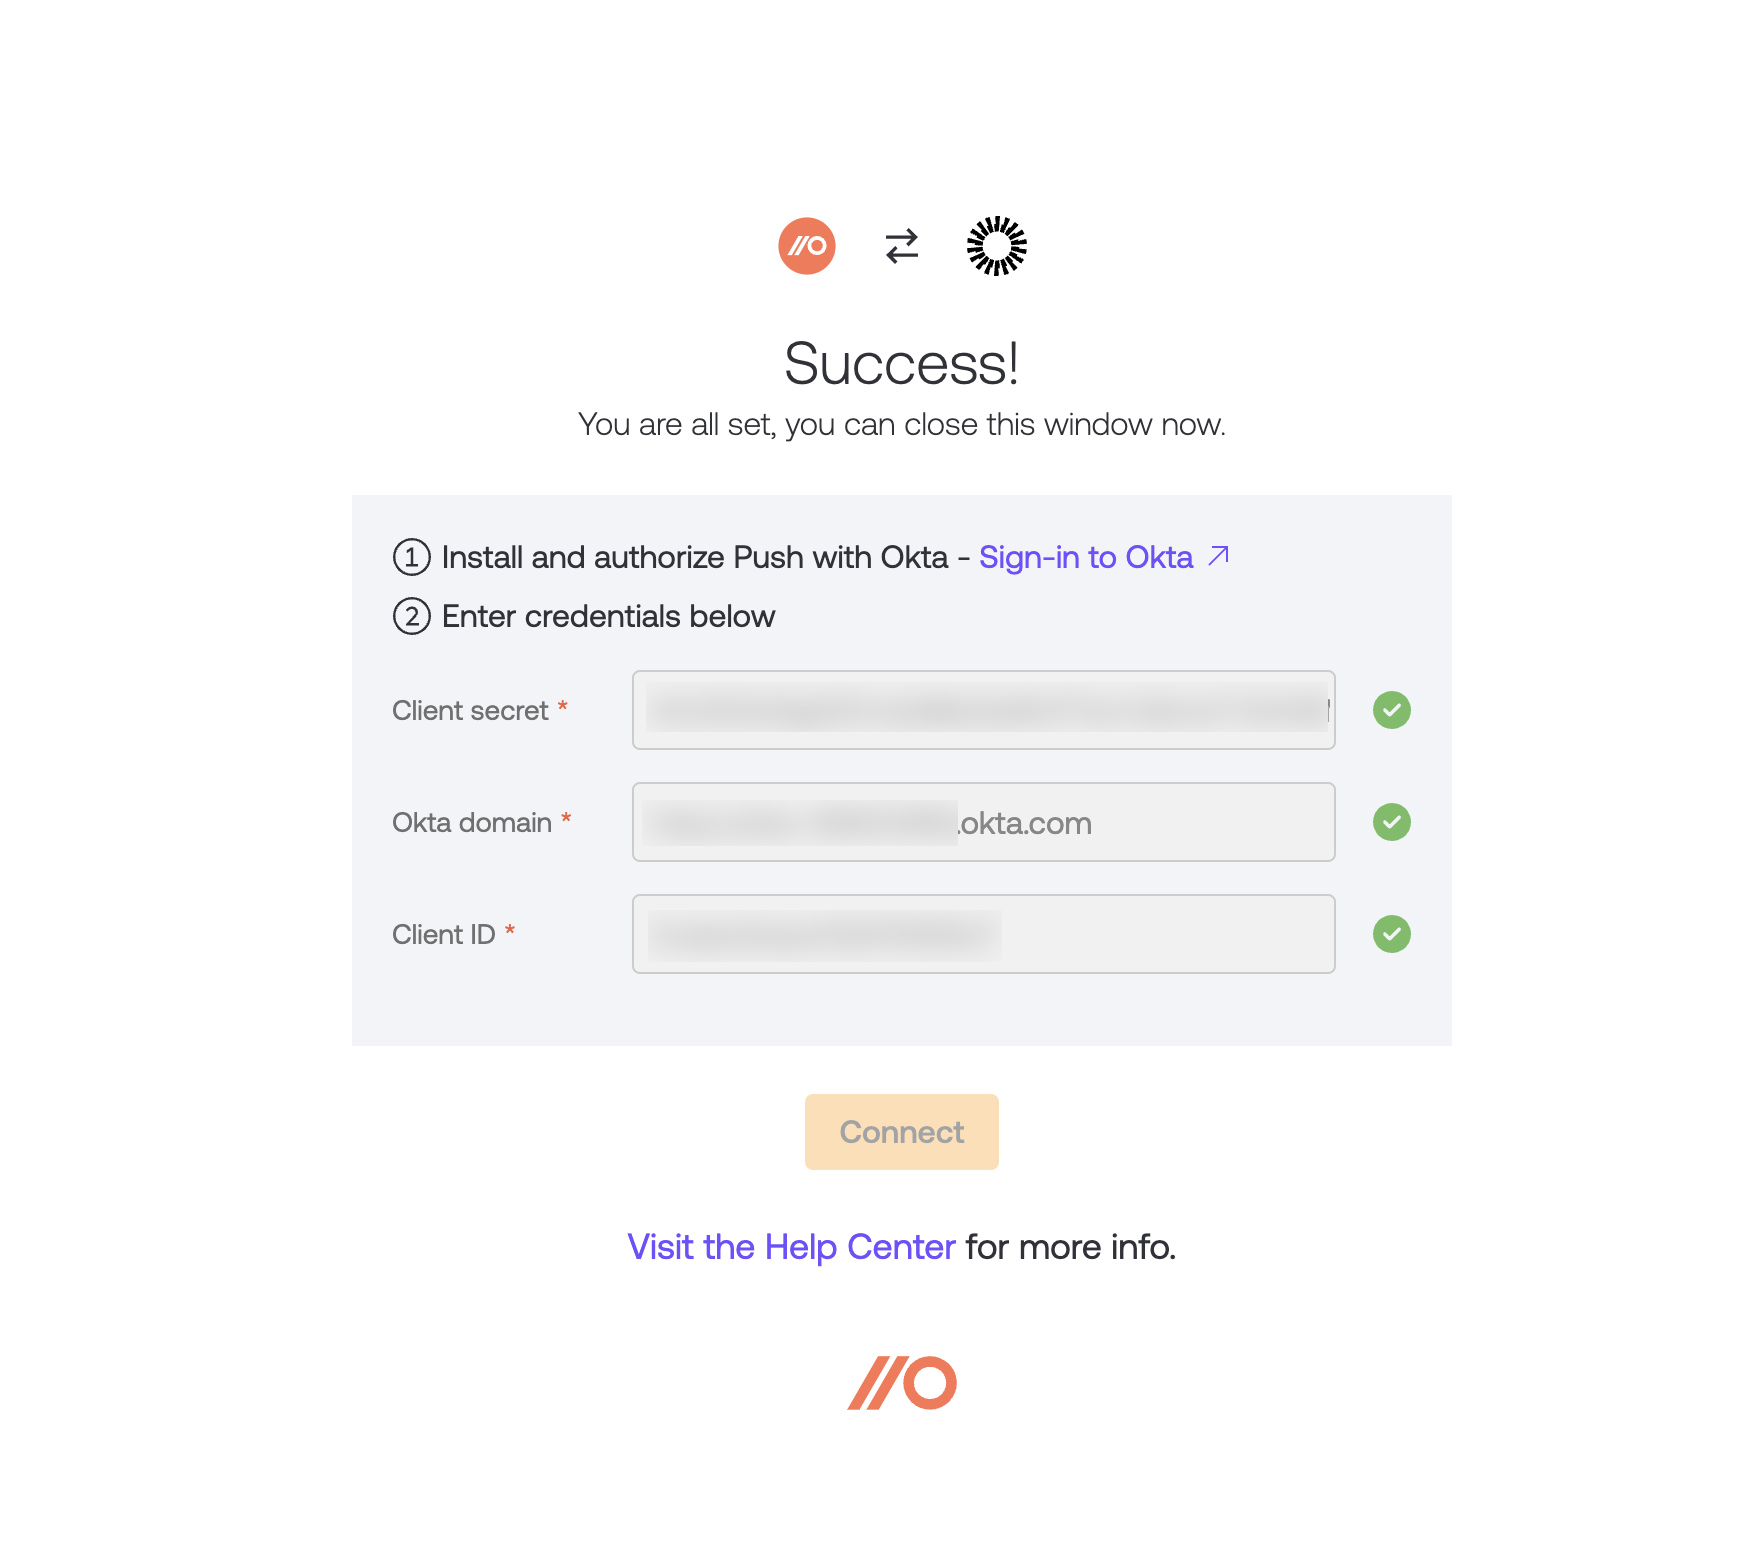
Once you’ve completed the integration, you can close the integration configuration screen and return to the Push admin console to select which users you want to license in Push from your Okta directory.
Note: If you don’t have admin permissions in Okta, you’ll see an error when you open the integration URL provided by Push.
Next steps
If you have not already deployed the Push browser extension to employee browsers, you’ll need to do that.
See: Install the browser extension for more details.
Syncing employee records and assigning licenses
After completing the integration, Push syncs with your work platform immediately and then once an hour after that to accommodate the addition or removal of employee accounts and to keep specific activity data up to date for licensed employees.
After you sync your work platform to Push, you’ll need to manually assign licenses to specific employees to add them to the Push platform.

Push does not automatically assign licenses to new employees unless you have enabled the automatic licensing option in conjunction with doing a managed deployment of the Push browser extension.
To quickly identify newly added employees in your workspace, check the First seen column in the Push list of unlicensed employees.

Revoking an identity provider integration
You can delete a work platform integration by going to Settings > Integrations in the admin console. Removing an integration will also remove from Push all the employee records tied to that integration, as well as their associated account activity data. Employees with no other associated accounts in Push will be removed from the Push platform.

Add manually
You can add employees manually by sending them an enrollment link via email. We recommend this approach if you are testing Push with your team before completing a rollout to your entire organization.
To add employees manually:
1. Log into the Push admin console.
2. Navigate to the Employees page in the left sidebar and select Manage.
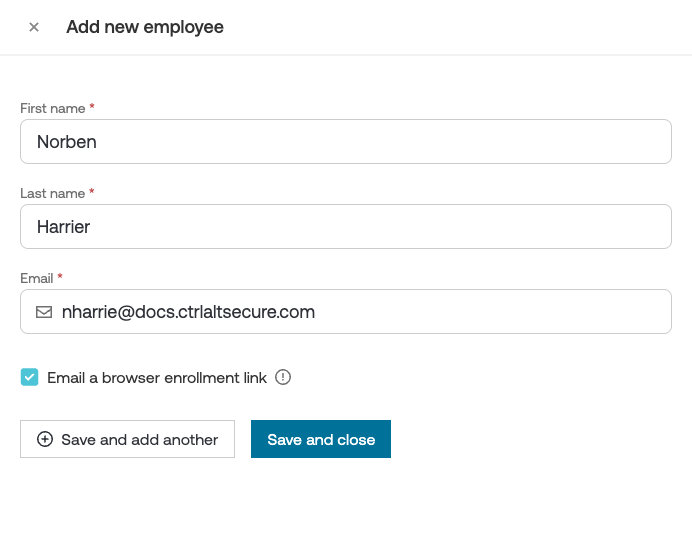
3. Select Add manually and enter the employee’s name and email address. You can email them an enrollment link to install the browser extension at the same time.
Manage employees
Employee groups
You can assign employees to custom groups by using the Groups feature. For example, you may wish to create custom groups for employee departments or teams. You can create groups manually or sync them with existing groups in your directory via the Push REST API.
To create a Group manually, choose an individual employee from the Employees page and open the employee details slideout.
In the Employee groups section, select the pencil icon and then use the type-ahead field to find existing groups or create a new group. You can add employees to multiple groups.
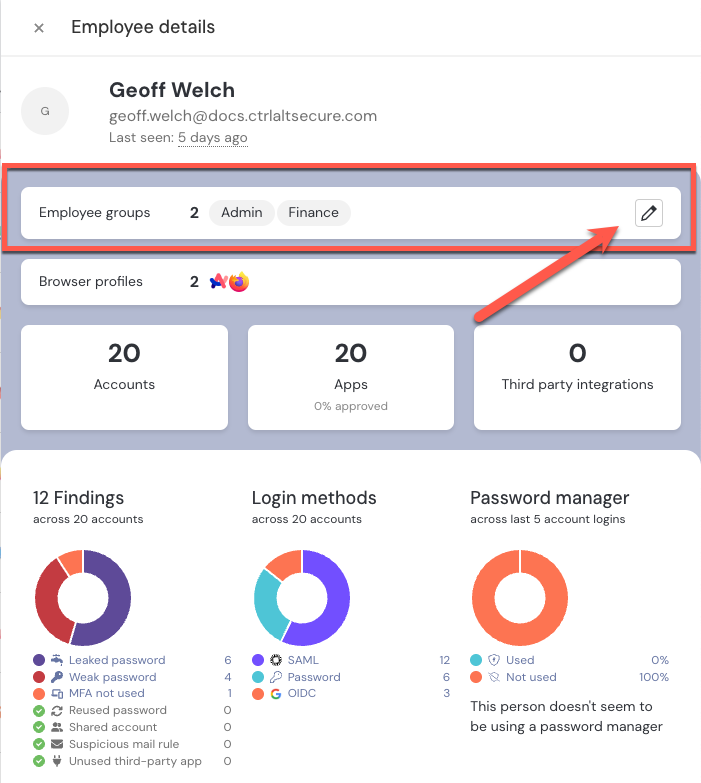
You can also add an employee to groups using the Actions menu on the Employees page. Select Manage employee groups. Or use the bulk actions option to add multiple employees to a group.
Use the filters in the admin console to filter by groups.
Merge employee records
If you have employees who use multiple email addresses, such as an administrator email address and a regular email address, you may wish to merge those employee records in Push so that they can be treated as a single human.
You can merge or unmerge employee records in the Push admin console or via the Push REST API.

After the merge, you can view an employee’s secondary email addresses by opening the employee details slideout from the Employees page and clicking the dropdown under their name. After a merge, all data associated with the merged employee records will roll up to the primary employee record, visible on the employee slideout from the Employees page.
For more details about how employee-associated data is treated during a merge, refer to this help article.
Hiding unlicensed employees
You can hide synced employee accounts that you don’t intend to assign a license in Push, such as service accounts.
Go to Employees and select the list of unlicensed employees. Choose the accounts you want to hide from the list of unlicensed employees and then choose Hide employees.
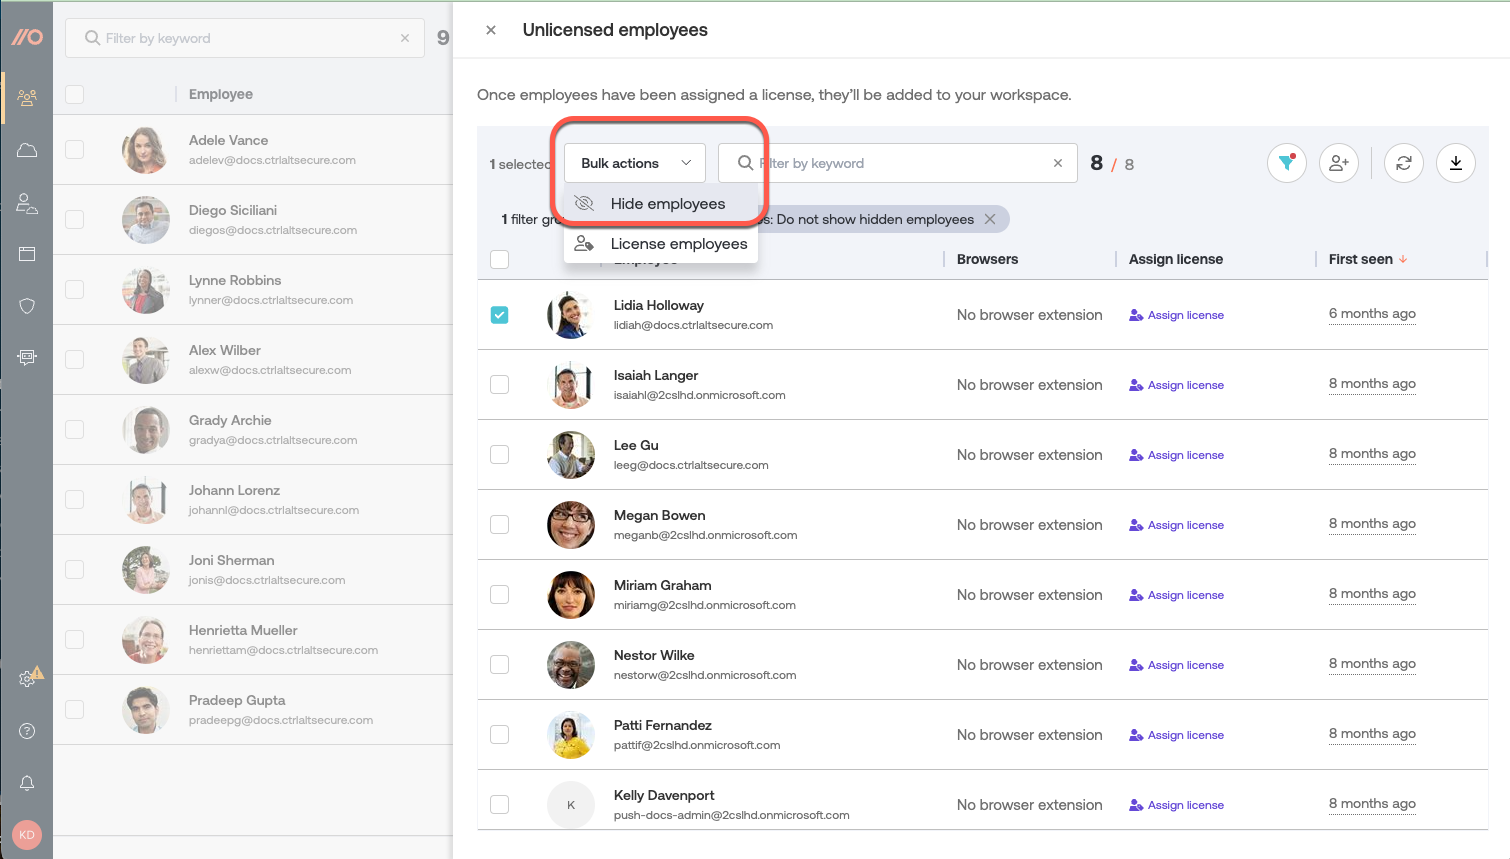
If you decide later that you want to license those hidden accounts, select the filter icon on the list and change the selection to Show only hidden employees. You can then assign them a license.
Removing employees
If you remove an employee account on your synced work platform after the employee has been licensed in Push and enrolled in the browser extension, their record will remain visible in the Push platform as long as they have associated accounts. You will need to manually remove the license for that employee.
If the employee was enrolled and licensed in Push via the automatic licensing option, their record will also remain in Push as long as they have associated accounts or browser activity, even if they have been removed from your synced work platform directory.
This allows administrators to offboard non-SSO accounts or perform an investigation after an incident without losing the user’s account and activity data.
Note: By default, Push will remove enrolled browsers that are inactive for 90 days or longer. Employee activity data remains in the platform until an employee is unlicensed.
You can configure a time period for automatically unlicensing users, if you prefer. Go to Settings > Licensing.
You can also remove accounts and employees using the admin console, or programmatically via the Push REST API. Or, if you prefer, you can set a data retention period for employee activity data by going to Settings > Organization > Data retention.
Manage employee browsers
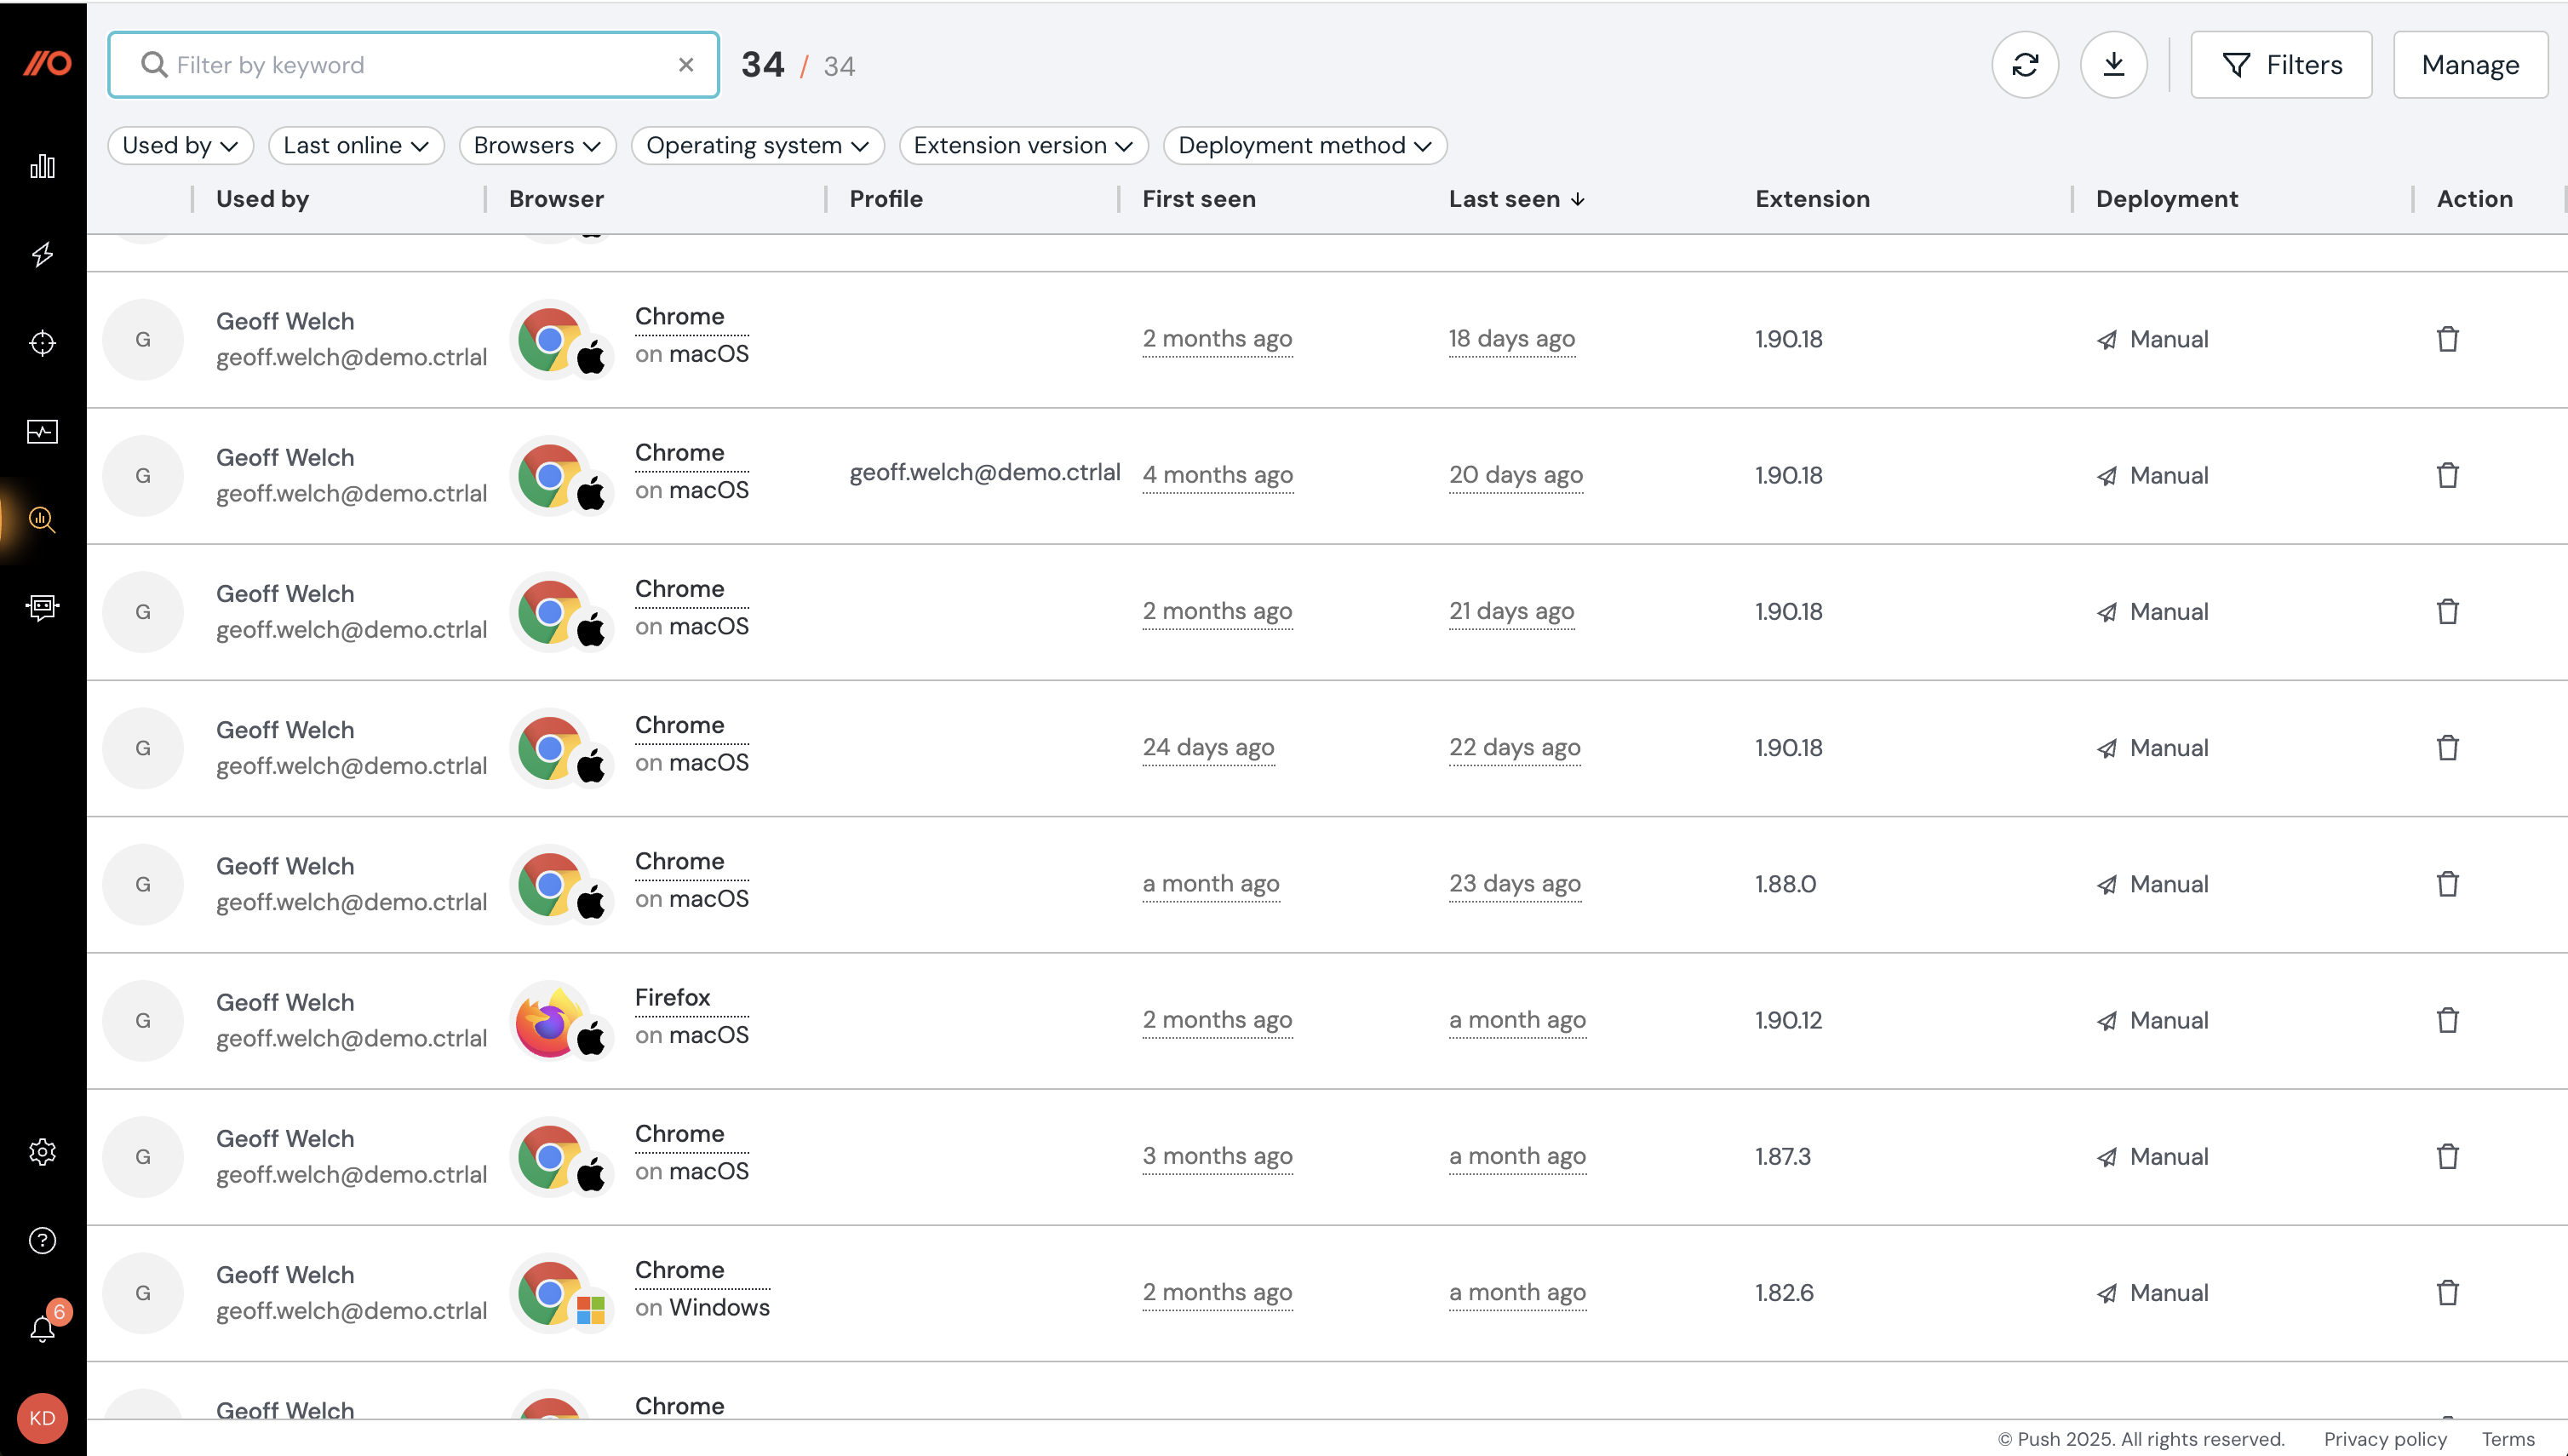
Once Push is deployed and your employees are enrolled, you can see individual browser details to help you view browser details, track your deployment progress or to troubleshoot issues by going to Inventory > Browsers. On this page, you can see and filter by:
Browser types and operating systems for each employee.
When a browser was last seen by Push.
Which extension version is deployed to that browser.
The deployment method (e.g. manual or managed).
Which email address is associated with a browser profile.
Whether an employee has turned on profile sync for that browser.
The language preference set for a given browser.
On the Browsers page, you can also remove individual enrolled browsers, or export the browser data to CSV or JSON.
