Inspired by the classic 1980s video game Oregon Trail, we’ve put together the following guide for intrepid security teams who are traveling across potentially unknown territory as they uncover their identity attack surface and secure it against modern identity attacks.
Inspired by the classic 1980s video game Oregon Trail, we’ve put together the following guide for intrepid security teams who are traveling across potentially unknown territory as they uncover their identity attack surface and secure it against modern identity attacks.
The journey ahead
So you’ve chosen Push to accompany you on your identity security journey. Good choice! We’ve got (threat) hunting supplies and a sturdy raft. It’s risky to go alone, though, so take this map with you.
Inspired by the classic 1980s video game* Oregon Trail, we’ve put together the following guide for intrepid security teams who are traveling across potentially unknown territory as they uncover their identity attack surface, including shadow identities and apps, and secure it against modern identity attacks.

(*For Push fans outside the U.S., Oregon Trail followed a group of pioneers as they attempted to cross the continent in a covered wagon, avoiding wild animals and hunting for food along the way. The memes now outlive the game, but we remember it fondly.)
In this guide, we’ll provide advice on what you can accomplish in your first three months after deploying Push to your workforce, transforming your employees’ browsers into a reliable control point to enforce a strong identity posture and stop account takeover.
In your first 90 days using Push, you can go far. Let’s take a look.
First 30 days: Get intel and secure against bears
This guide assumes you’ve identified a few identity security goals already. These probably include things like:
Closing gaps in existing security controls to protect against MFA bypass attacks like Adversary-in-the-Middle (AiTM) phishing toolkits.
Increasing visibility of user activity in the browser to identify and respond to threats.
Using federated SSO-based logins over password-based logins to limit the number of identities created, and removing unused login methods.
Implementing phishing-resistant authentication methods, and removing phishable ones.
Where password use cannot be avoided, ensuring good hygiene (no weak, reused, or breached passwords) and phishing-resistant MFA factors.
Then, once you’ve deployed the Push browser extension to your browser ecosystem, invited your security team to the Push admin console, and begun collecting behavioral and identity posture data from your employees’ login activity, you’re ready to embark.
Right away, you can set up your first out-of-the-box security control to provide novel and effective protection against adversary-in-the-middle (AiTM) phishing toolkits such as Evilginx, EvilNoVNC, and others.
It’s the identity security equivalent of bear deterrent (something sadly lacking on the Oregon Trail), and it takes just a couple of minutes.
You can also set additional security controls in Monitor mode and begin collecting valuable insights from your users’ account and app activity.
Here’s what we recommend for your first 30 days using Push:
Enable phishing tool detection in Warn or Block mode
Begin protecting employees from adversary-in-the-middle phishing from AitM tools by enabling Phishing tool detection.
From the Controls page in the Push admin console, select Phishing tool detection and set the mode to Warn or Block.
Customize the message that employees will see if they encounter a malicious site.
Add domains to the ignore list if you wish to ignore enforcing the control on specific domains or encounter any domains that trigger false positives.
You can monitor the Events page (or send Push events to an external SIEM or SOAR) to see when the control is triggered.
You may also wish to communicate with your end-users to let them know you’re enabling a new security protection to stop phishing attacks and that if they encounter a malicious site, they’ll see a warning.
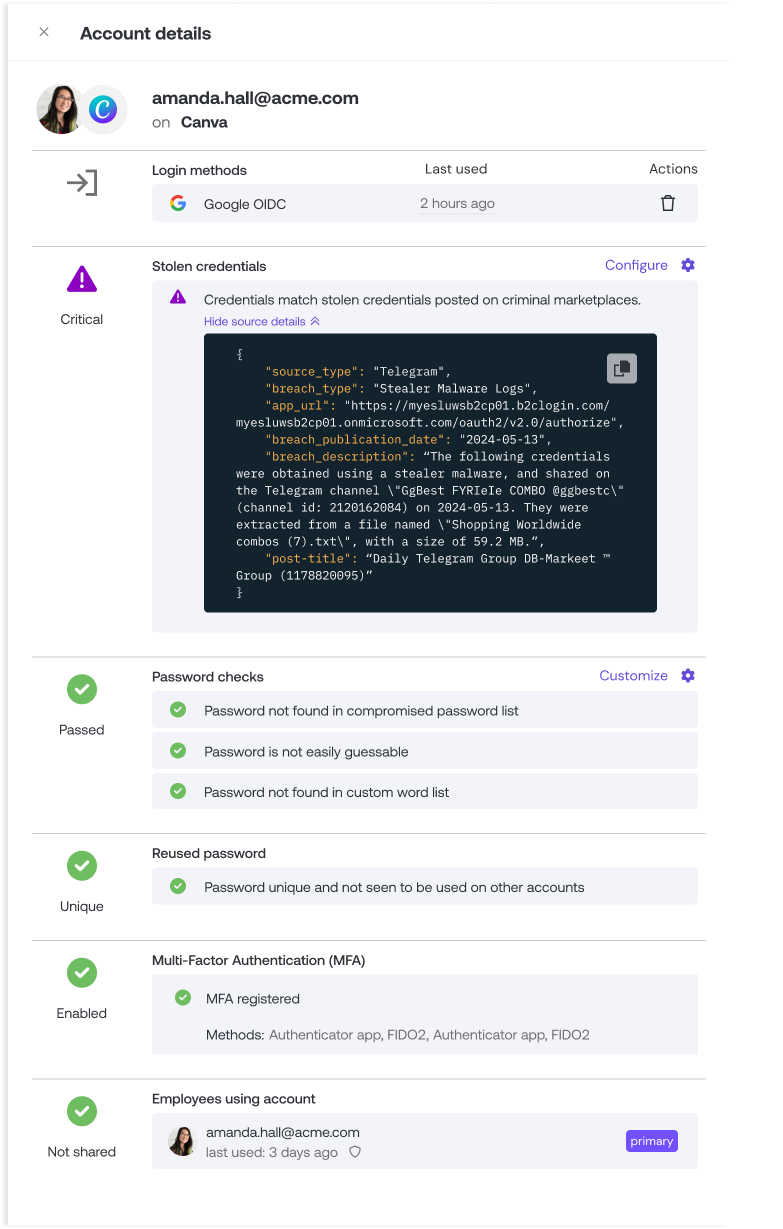
Check for verified stolen credentials
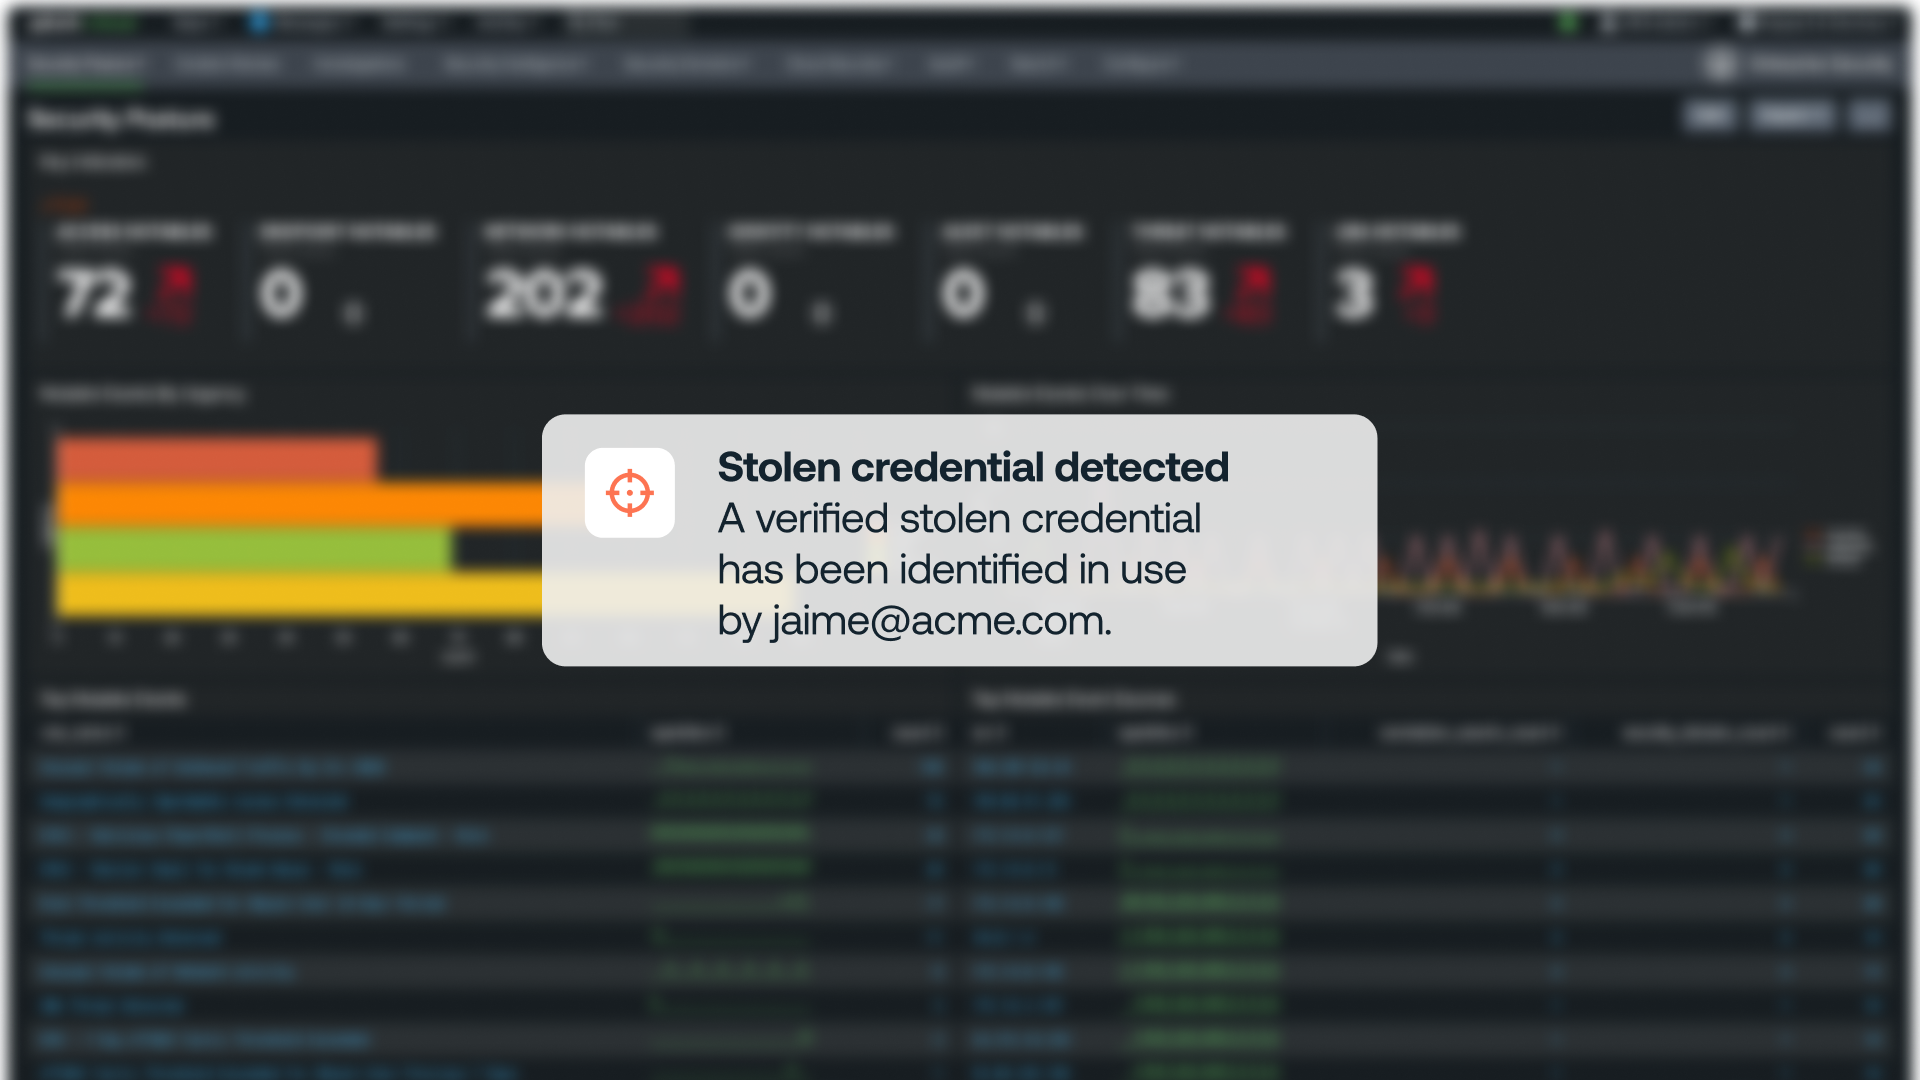
Push uses threat intelligence sources to compare suspected stolen credentials to those still actively in use across your workforce identities. You don’t need to configure anything for this feature, and you can check for any verified true positives by viewing the Vulnerable identities section of the Dashboard.
We recommend investigating immediately and taking action to remediate any accounts with verified stolen credentials.
Enable additional security controls in Monitor mode
Next, set up additional security controls in Monitor mode so you can begin finetuning your configuration or adding to ignore lists. A few details to keep in mind:
For all controls, update your Custom login URLs list on the Settings page to include any custom URLs you use for your identity provider or other important apps, so that Push can correctly identify those logins as belonging to your IdP (or other app).
For SSO password protection, we recommend starting in Monitor so you can identify any sites in your environment that cause false positives, such as sites that are configured to legitimately allow use of SSO credentials. Then add these sites to your ignore list. By running in monitor mode for a few weeks, you can also get a sense of how often employees are reusing their corporate IdP credentials on other sites where they shouldn’t, such as personal apps.
For cloned login page detection, set the mode to Monitor to receive events when employees visit a site using a cloned login screen for important apps including your identity provider.
For URL blocking, test a blocked URL or begin compiling a list of URLs you wish to block, such as AiTM sites discovered through phishing sites you find while using the Phishing tool detection feature.
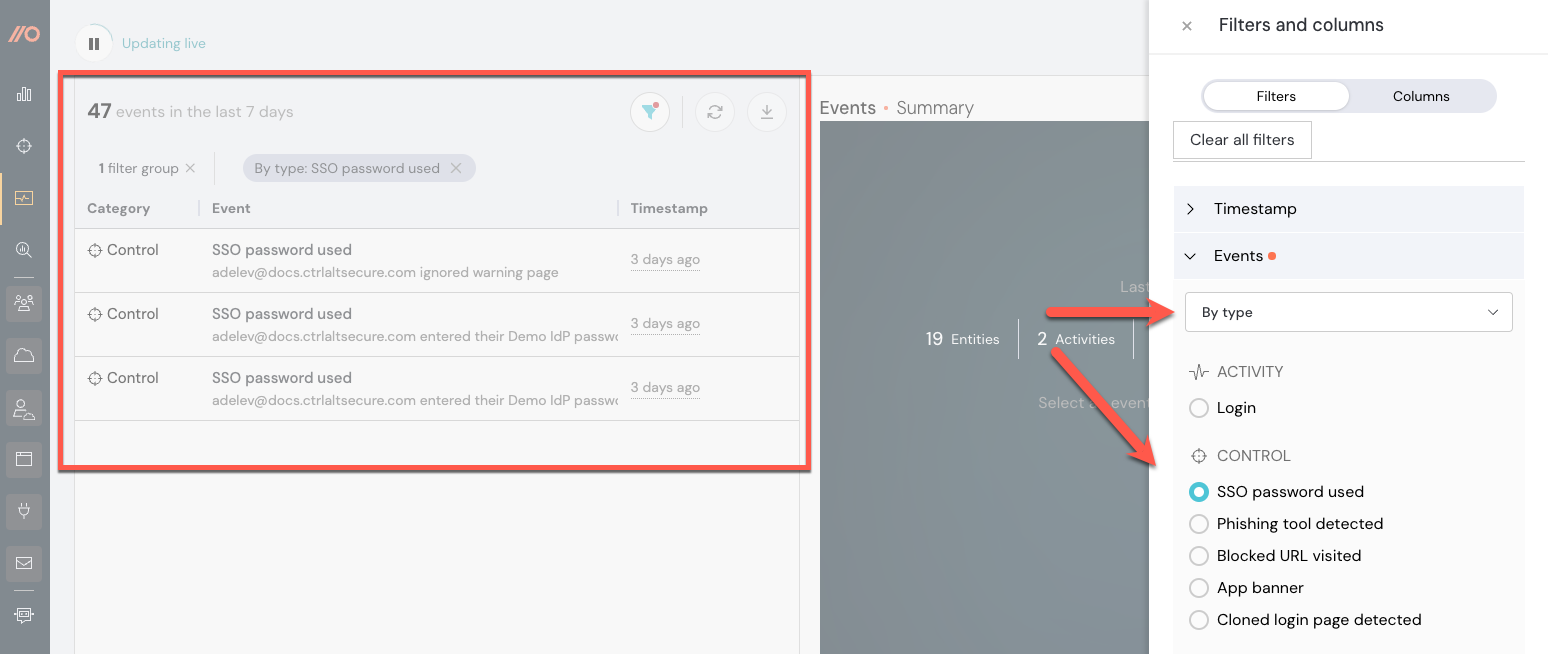
To see events generated by these controls, filter the Events page. Go to the filters icon, then select Events > By type from the dropdown and choose the specific control to see associated events.
Set up alerts for your security team
Push can send notifications of interesting employee activity to a Microsoft Teams or Slack channel so you can stay on top of new apps and account security findings. In the admin console, go to the ChatOps page and integrate your Teams or Slack instance, then enable topics you wish to get notified about.

First 60 days: Go (threat) hunting
Now you’re ready to survey the landscape and see where there are dangers hiding among your workforce identities such as missing MFA or SSO, unused accounts, compromised passwords, and unsanctioned or untrustworthy apps and integrations.
Luckily, Push doesn’t make you forage for the important information. Use the Dashboard in the Push admin console to pinpoint vulnerable identities and see SSO trends and other insights.
After getting a baseline understanding of your ecosystem, you can begin translating your security policies into actionable controls by preparing end-users and creating the foundation for control configuration rules.
Here’s what we recommend for your second month using Push:
Understand which identities are most vulnerable to account takeover
On the Dashboard, you can identify which identities are most at risk because they use a leaked, reused, or weak password and lack MFA by referencing the Vulnerable identities section.
Tip: Toggle the view to All identities if you are not yet using the sensitivity labels for apps to get a full picture of your data.
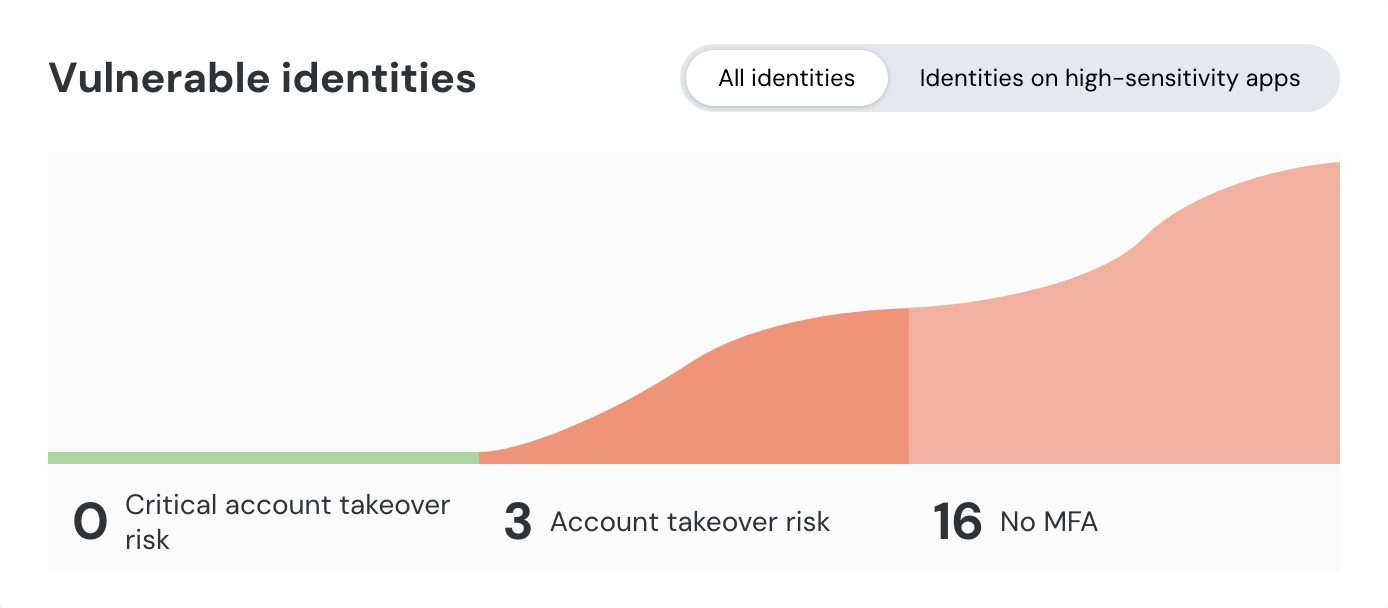
Select each slice of the chart to go to a filtered list of the accounts with those security issues. You can then evaluate which accounts pose the biggest risk, whether they belong to high-sensitivity apps or high-value roles, such as admins or executives, or whether there are any data patterns, such as a cluster of account issues that belong to specific teams, that will help you decide on a remediation strategy.
As mentioned earlier, we recommend taking immediate action for any accounts with verified stolen credentials, especially those that also lack MFA protection.
Check your SSO coverage
On the Dashboard, you can also start to see your SSO trends. Use this section of the dashboard to see a breakdown of login methods for your accounts (SAML, OIDC, or non-SSO).
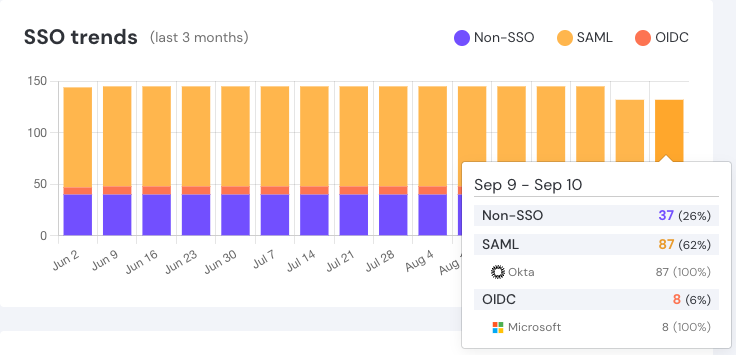
You can look at more granular information on the Accounts page by filtering by Login method. For example, you may wish to view accounts that have used both password and SAML login methods to identify local accounts on high-value apps that should be using SSO only — otherwise known as ghost logins.
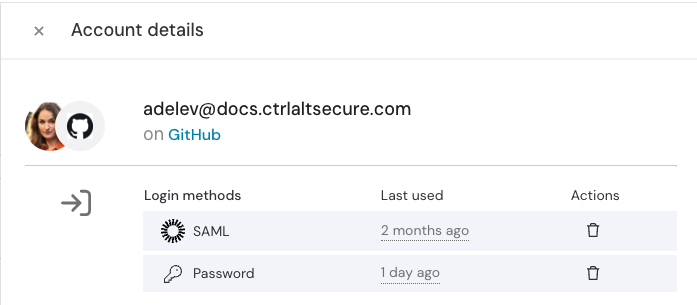
Review patterns in employee activity
Using the Apps, Employees, and Accounts pages, you can then get a sense of which apps employees are accessing, using which login methods, whether they’re registered for MFA (and which MFA methods are registered on the account), whether they’re using a password manager, and where there are account security issues such as weak, reused, or shared passwords.
Tip: Use the filters on these pages to zero in on issues of interest, such as password logins, account security findings, or weak MFA methods.
Put your security policies into practice
Equipped with this context, now you’re ready to lay the foundation for remediation and blocking controls, putting your security policies into practice.
At this stage, we recommend that you:
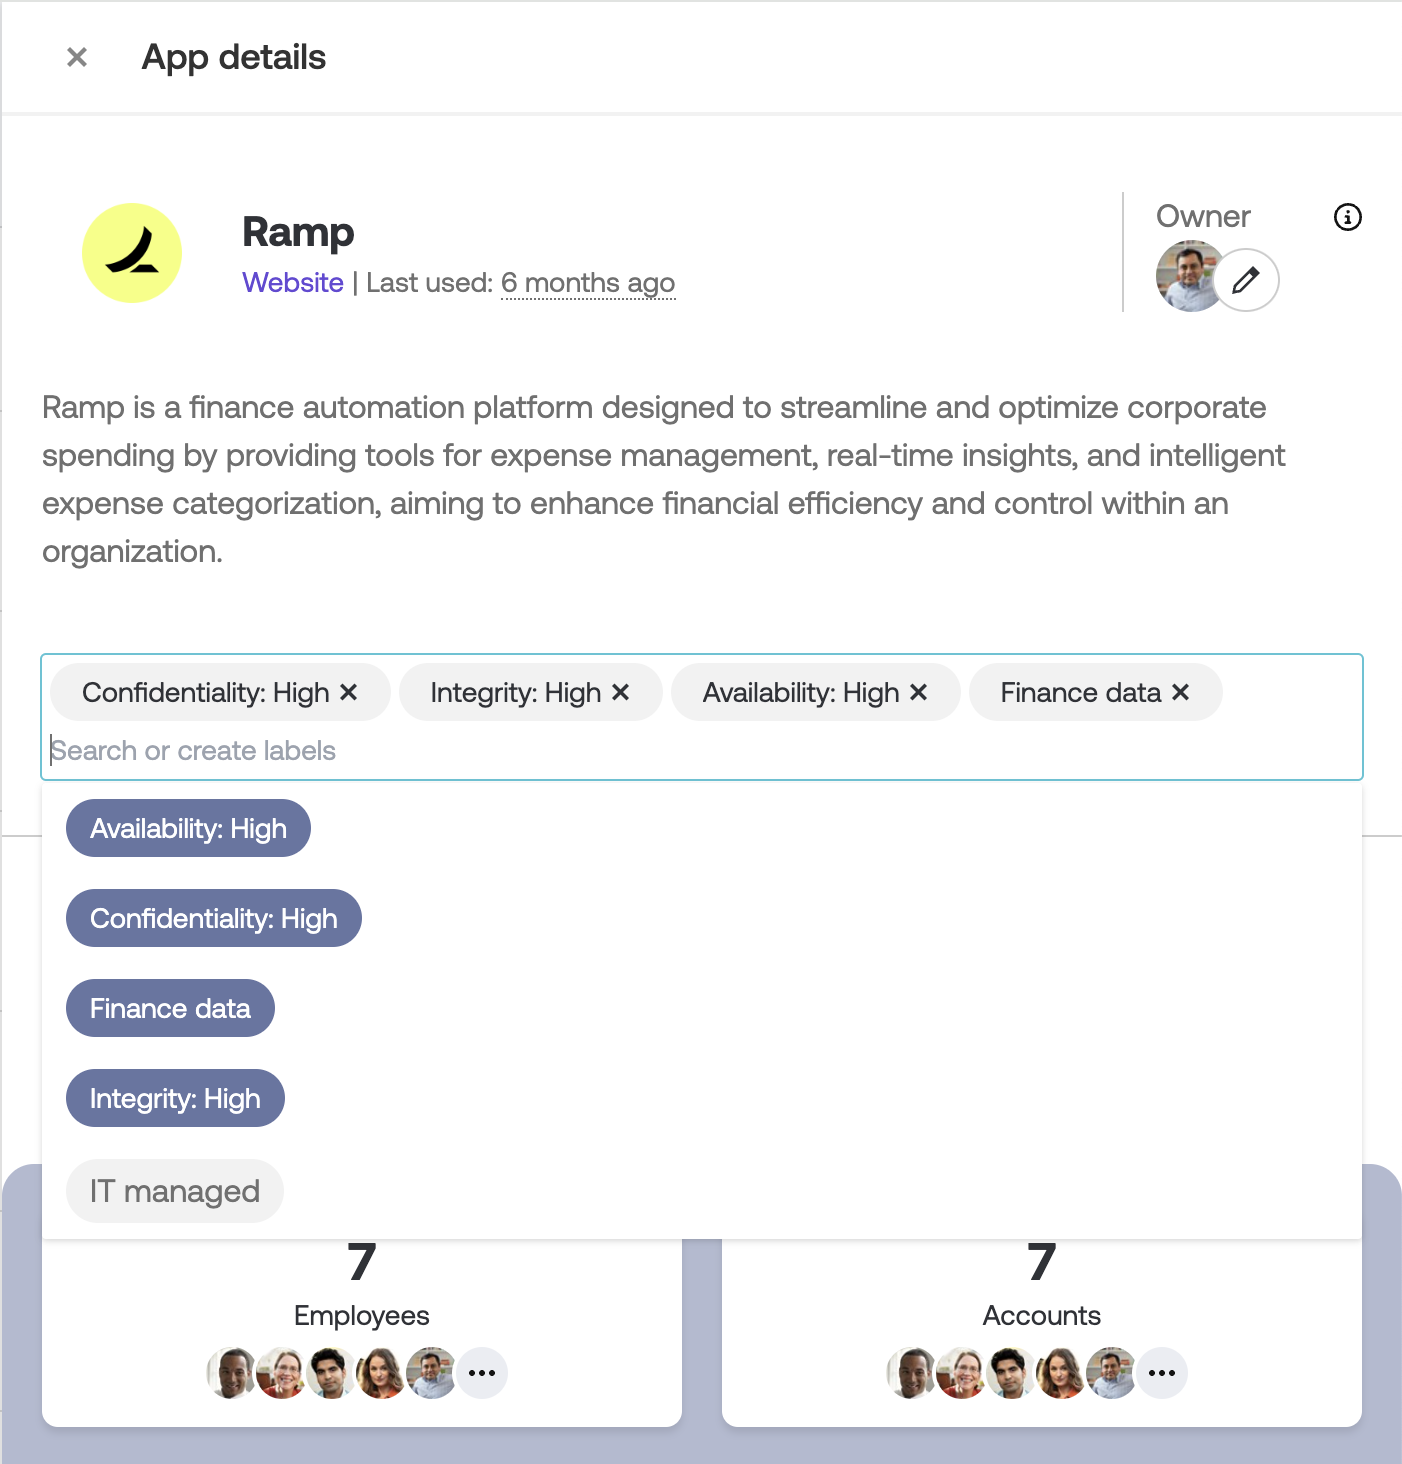
Set the Approval status and Sensitivity level of your apps using the provided categories in Push.
Create employee groups (which can be done manually or via API to match your existing directory groups) and assign employees to them based on department or job function.
Create custom labels for apps as needed.
By adding this metadata, you’ll be able to use these classifications when configuring rules for how to apply your desired security controls.
Before enabling end-user remediation and blocking controls, which we cover in the next section, you may also wish to let your employees know what they should expect to see in terms of self-remediation workflows or other employee-facing guidance in their browser.
First 90 days: Remediate issues and arrive safely
With your team prepared and your rifle well-oiled, you’re ready to pick off security issues like SSO password phishing; missing MFA; and use of unsanctioned apps.
Here’s what we recommend for your third month using Push:
Move security controls out of Monitor mode to Warn or Block
Once you’ve informed your employees and curated your ignore list, you’re ready to move security controls such as SSO password protection into Warn or Block mode. (If you have not already set the Phishing tool detection control to Warn or Block, now is also a good time to do that.)
From the Controls page of the admin console:
Open the tile for the given control and update the Mode.
Create a custom message that employees will see when the control is triggered.
Save the configuration.
If possible, we also recommend consuming the webhook events generated when these controls are triggered in your SIEM or other alerting platform so you have good visibility.
If you’ve found any malicious sites using the Phishing tool detection or Cloned login page detection control, you may also wish to update your blocklist using the URL blocking control.
Implement banners to guide secure employee behavior
Depending on your security goals, you may want to implement in-browser guidance for employees in the form of App banners. You can configure a banner in Inform, Acknowledge, Reason, or Block modes from the Controls page. Use the Rules feature to specify which employees or employee groups should see a banner, and which apps to apply it to.
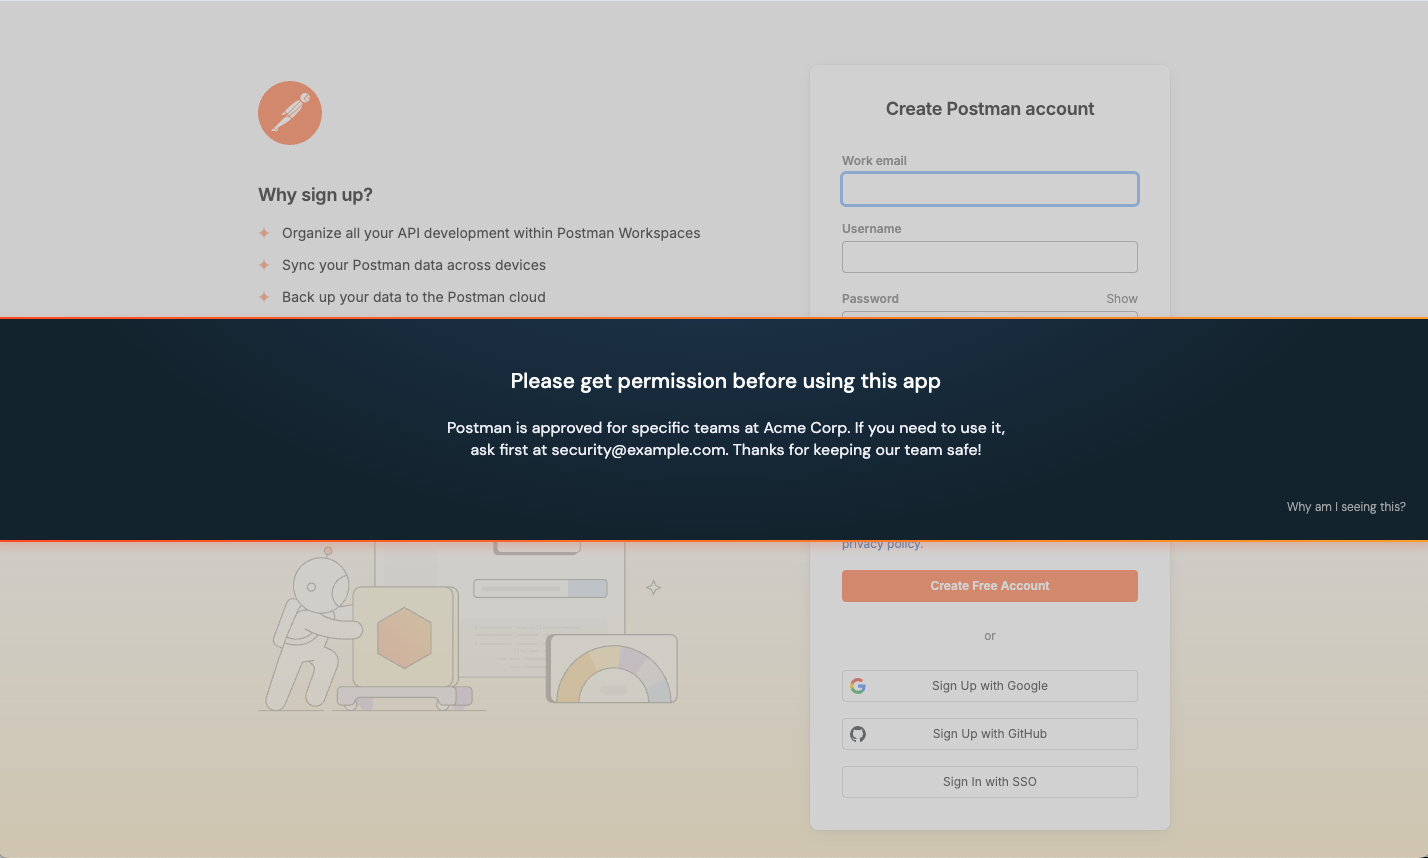
Common use cases include:
Blocking an app while you investigate a potential data breach.
Blocking unapproved apps, such as a file-sharing service that’s not approved for storing sensitive information.
Requiring employees to acknowledge your GenAI policy before using GenAI apps.
Reminding employees to use SSO for SAML-enabled apps rather than a local account password.
Asking employees not to use an app before it can be reviewed by the security team, for apps not yet in your inventory.
Tip: You can monitor employee engagement with app banners on the Events page and send webhook events for when a banner is displayed or interacted with to your SIEM or SOAR.
Enforce MFA on high-value apps
If you’ve identified accounts on important apps that lack MFA, you can prompt employees to add an MFA method using MFA enforcement. This control uses an in-browser message to direct employees to register for MFA on apps where they lack it. This control is enabled on a per-app basis, so you can decide where you want to prompt for MFA registration.
From the Controls page, select the MFA enforcement tile.
Customize the message to employees, if you like.
image
Send events to your SIEM or SOAR
To stay informed about end-user activity, findings, and controls on the Push platform, we recommend consuming events important to your security strategy in your SIEM, SOAR, or other similar alerting or automation platform.
Use the Events page in the admin console to get familiar with the data structure of events, as well as the volume of events, and then review our REST API and webhooks documentation for details on which entities, activities, control events, and audit logs you can consume.
Next: Chart your own course
In your first 90 days and beyond, you can also begin creating custom workflows in your SIEM or SOAR platform to take Push’s browser and user activity telemetry and transform it into the triggers for solving specific problems in your environment.
Here are some ideas for what you can accomplish using Push’s REST API and webhooks:
Harden identities and reduce account compromise, such as alerting you when passwords are identified in public data breaches or when employees are using an unapproved app or when an SSO app is accessed via local account.
Monitor for suspicious activity or high-risk changes, such as checking for MFA method changes, or flagging when employees reuse corporate SSO passwords or visit sites running phishing malware.
Investigate indicators of compromise, such as correlating login events with platform logs, searching for recent signups to risky apps, or identifying post-compromise lateral movement opportunities.
Force-reset an IdP password if Push finds a compromised password on an employee account.
Automate a workflow showing you all the accounts and apps used by an employee you’re offboarding, and their account login methods.
Automate a workflow to revoke licenses on SaaS after a period of inactivity, saving money.
Build an approved apps list in your company wiki, synced from Push’s source of truth.
If you’ve made it this far, congratulations! You did not die of identity attacks.


